Lab 3.4: Linux System Audits
VMs Needed
- Windows
- Ubuntu
- Alma
Please ensure that these VMs are running before you begin the lab. There is no need to log on to the console of any of the course VMs except for Windows.
Lab Video
Objectives
- Use Lynis to perform a full OS audit of the Ubuntu VM.
- Perform InSpec tests of the Distribution Independent Linux benchmark on Alma and Ubuntu.
- Review Nessus scan results for Alma and Ubuntu.
Lab Preparation
Boot the VMs required for the lab (see the "VMs Needed" section above) and log on to the Windows VM using the username student and the password student.
Part 1: Start Nessus Credentialed Scan of Linux Hosts
Preparation: If you are not already logged onto Nessus, open Firefox in the Windows VM and click on the bookmark for Nessus.

If prompted, log in with username student and password student.
Background: In this section of the lab, you will configure a full authenticated Nessus vulnerability scan against the Alma and Ubuntu VMs. Actually running the scan will be optional, since scans can take a long time to complete. We've provided a scan results file you will import and analyze in another section of this lab.
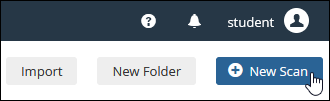
Instructions: In the Nessus web interface, click the New Scan button at the top right corner of your screen.
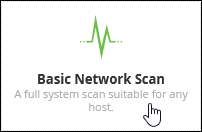
Choose the "Basic Network Scan" scan type by clicking on its icon.
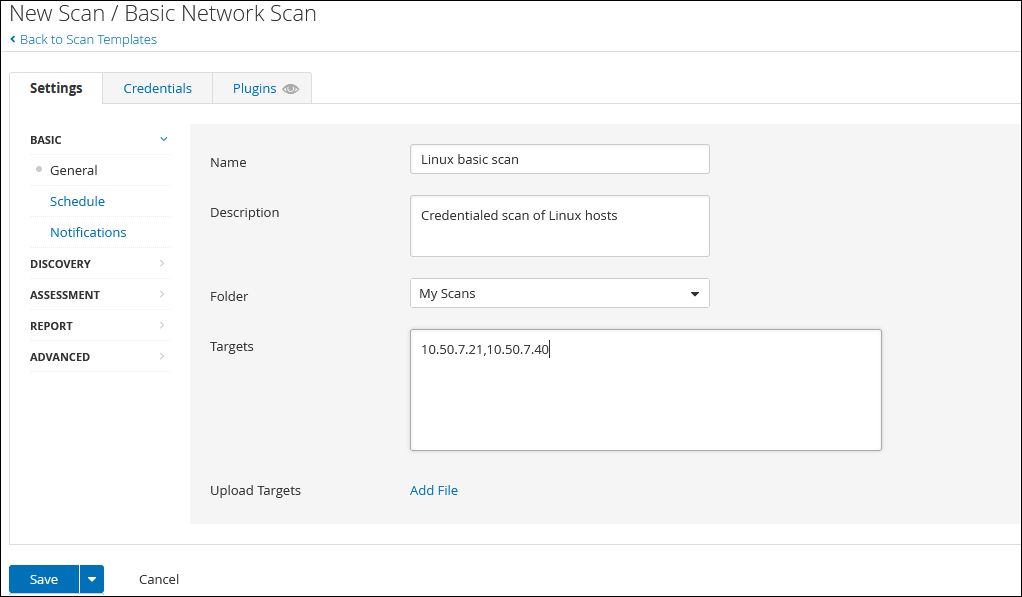
On the Settings tab, enter this information:
Name:
Linux basic scan
Description:
Credentialed scan of Linux hosts
Targets:
10.50.7.21,10.50.7.40
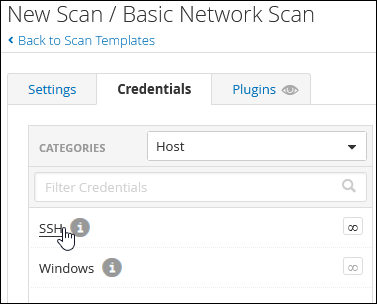
Next, click on the Credentials tab. Then, click on the SSH link to add a new set of SSH credentials.
Choose these settings for the new credentials:
Authentication method: password
Username: student
Password: student
Elevate privileges with: sudo
sudo user: root
sudo password student
Note that public key or certificate authentication would be preferred on a production system. Tenable recommends using a known_hosts file to ensure that Nessus only uses passwords for legitimate servers, lessening the risk that an attacker could run their own malicious SSH server to capture the credentials.
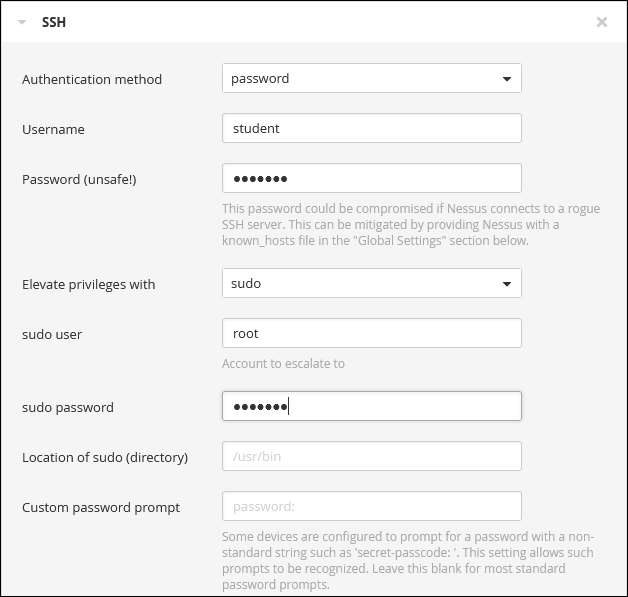
When the settings are correct, click on the Save button to return to the My Scans page.
Optional: Run the Scan
Click the Launch button if you would like to start running the scan.

Once the scan has started running (indicated by the spinning green arrows), you can continue with the next section of the lab.
Part 2: Lynis System Audit
Preparation: Open an SSH connection to the Ubuntu VM in Windows Terminal. Click the down arrow icon and select SSH-Ubuntu from the drop-down menu.
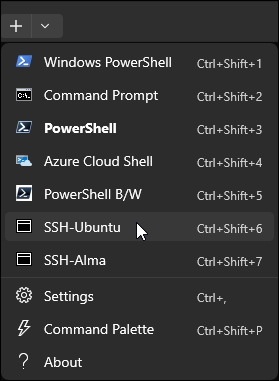
The Lynis tool used in this section of the lab needs to be run as the root user, so elevate to a root login session with this command:
sudo su -
Environment Check
Before proceeding, ensure that you are working in Windows Terminal in a root SSH session to the Ubuntu VM.
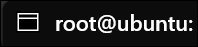
Background: Lynis is an open-source audit tool for Linux. (There are commercial support and enterprise features available for purchase from the developer.) In this section of the lab, you will use Lynis to perform an assessment of your Ubuntu VM.
Instructions: Ensure that the Lynus program files are copied into root's home directory with these commands:
cp -vR /home/student/labFiles/lynis /root
chown -R root:root /root/lynis
chmod +x /root/lynis/lynis
Change into the /root/lynis directory you just created and then run Lynis in quick mode. It will perform a configuration audit of the system, storing a log and a report in the /var/log/ directory:
cd /root/lynis
./lynis -Q
Sample Results
root@ubuntu:~# cd /root/lynis
root@ubuntu:~/lynis# ./lynis -Q

[ Lynis 3.0.9 ]

################################################################################
Lynis comes with ABSOLUTELY NO WARRANTY. This is free software, and you are
welcome to redistribute it under the terms of the GNU General Public License.
See the LICENSE file for details about using this software.

2007-2021, CISOfy - https://cisofy.com/lynis/
Enterprise support available (compliance, plugins, interface and tools)
################################################################################


[+] Initializing program
------------------------------------
- Detecting OS...                                           [ DONE ]
- Checking profiles...                                      [ DONE ]

---------------------------------------------------
Program version:           3.0.9
Operating system:          Linux
Operating system name:     Ubuntu
Operating system version:  24.04
Kernel version:            6.11.0
Hardware platform:         x86_64
Hostname:                  Ubuntu-99
---------------------------------------------------
Profiles:                  /root/lynis/default.prf
Log file:                  /var/log/lynis.log
Report file:               /var/log/lynis-report.dat
Report version:            1.0
Plugin directory:          ./plugins

...
[Results Truncated]
When the test finishes, review the report Lynis generated in the /var/log/directory. Use spacebar, the arrow keys, and q to navigate the pagination program less.
less /var/log/lynis-report.dat
Sample Results
# Lynis Report
report_version_major=1
report_version_minor=0
report_datetime_start=2025-07-02 13:11:21
auditor=[Not Specified]
lynis_version=3.0.9
os=Linux
os_name=Ubuntu
os_fullname=Ubuntu 24.04.2 LTS
os_version=24.04
linux_version=Ubuntu
os_kernel_version=6.11.0
os_kernel_version_full=6.11.0-1012-azure
hostname=Ubuntu-99
test_category=all
test_group=all
plugin_directory=./plugins
suggestion[]=LYNIS|Version of Lynis outdated, consider upgrading to the latest version|-|-|
lynis_update_available=1
binaries_count=2049
binaries_suid_count=/usr/bin/chfn /usr/bin/chsh /usr/bin/fusermount /usr/bin/fusermount3 /usr/bin/gpasswd /usr/bin/mount /usr/bin/newgrp /usr/bin/passwd /usr/bin/pkexec /usr/bin/sg /usr/bin/su /usr/bin/sudo /usr/bin/sudoedit /usr/bin/umount /usr/sbin/mount.cifs /usr/sbin/mount.smb3
binaries_sgid_count=/usr/bin/chage /usr/bin/crontab /usr/bin/expiry /usr/bin/ssh-agent /usr/sbin/pam_extrausers_chkpwd /usr/sbin/postdrop /usr/sbin/postqueue /usr/sbin/unix_chkpwd
binary_paths=/snap/bin,/usr/local/games,/usr/games,/usr/bin,/usr/sbin,/usr/local/bin,/usr/local/sbin
vm=1
vmtype=microsoft
container=0
systemd=1
...
[Results Truncated]
Live Data in Use!
Remember that your data will differ from the screenshots!
After you have moved through several pages of output, you may notice that Lynis makes its recommendations in lines that begin with the word "suggestion." To view only these lines, use the following command:
grep "^suggestion" /var/log/lynis-report.dat | less
You can use the 'q' key to exit the less program when you have finished viewing the report.
Sample Results
suggestion[]=LYNIS|Version of Lynis outdated, consider upgrading to the latest version|-|-|
suggestion[]=BOOT-5122|Set a password on GRUB boot loader to prevent altering boot configuration (e.g. boot in single user mode without password)|-|-|
suggestion[]=BOOT-5264|Consider hardening system services|Run '/usr/bin/systemd-analyze security SERVICE' for each service|-|
suggestion[]=KRNL-5820|If not required, consider explicit disabling of core dump in /etc/security/limits.conf file|-|-|
suggestion[]=AUTH-9229|Check PAM configuration, add rounds if applicable and expire passwords to encrypt with new values|-|-|
suggestion[]=AUTH-9230|Configure password hashing rounds in /etc/login.defs|-|-|
suggestion[]=AUTH-9262|Install a PAM module for password strength testing like pam_cracklib or pam_passwdqc|-|-|
...
[Results Truncated]
On your own, read through the suggestions and determine which ones seem critical enough to include in an audit report.
Exit your root session when you have finished. Use the exit command to return to your unprivileged shell.
exit
Sample Results
root@ubuntu:~/lynis# exit
logout
student@ubuntu:$
Part 3: InSpec Benchmark Scan of Ubuntu
Background: In this section of the lab, you will use an InSpec profile from the Dev-Sec.io GitHub repository against the Ubuntu VM. You'll be using the Distribution Independent Linux CIS benchmark so that the results will be comparable between the Ubuntu host and the Alma host, which you will test in another lab section.
Environment Check
Before proceeding, ensure that you are working in Windows Terminal in a SSH session to the Ubuntu VM.
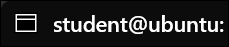
Instructions: Set your working directory to the InSpec folder in your home folder. It contains a clone of the Dev-Sec.io InSpec benchmark profile repository.
cd /home/student/labFiles/inspec/
When you run the inspec profile against the local host, you will specify two different output formats:
documentation creates plaintext output with test information and results. This output is useful for your audit working papers to have a log of the controls tested and the results.
html2 creates the formatted HTML report that you may have reviewed in other labs. That output is sent into an HTML file into the web root of the local web server. This will allow you to view test results in your web browser, something you may want to do during meetings with the administrators or management.
Using the tee command allows you to see the documentation output on the screen while the test is running, and writes the text output to a file in the web root for your later viewing.
Run this command to start the tests:
inspec exec ./cis-dil-benchmark/ --reporter html2:/var/www/html/ubuntuReport.html documentation | tee /var/www/html/ubuntuReport.txt
Sample Results
student@ubuntu:$cd /home/student/labFiles/inspec/
student@ubuntu:$inspec exec ./cis-dil-benchmark/ --reporter html2:/var/www/html/ubuntuReport.html  documentation | tee /var/www/html/ubuntuReport.txt

Kernel Module cramfs
  is expected not to be loaded
  is expected to be disabled (FAILED - 1)

Kernel Module freevxfs
  is expected not to be loaded
  is expected to be disabled (FAILED - 2)

Kernel Module jffs2
  is expected not to be loaded
  is expected to be disabled (FAILED - 3)
...
[Results Truncated]
When the tests have finished running, you can view both result files in Firefox using these URLs:
http://10.50.7.50/ubuntuReport.html
http://10.50.7.50/ubuntuReport.txt
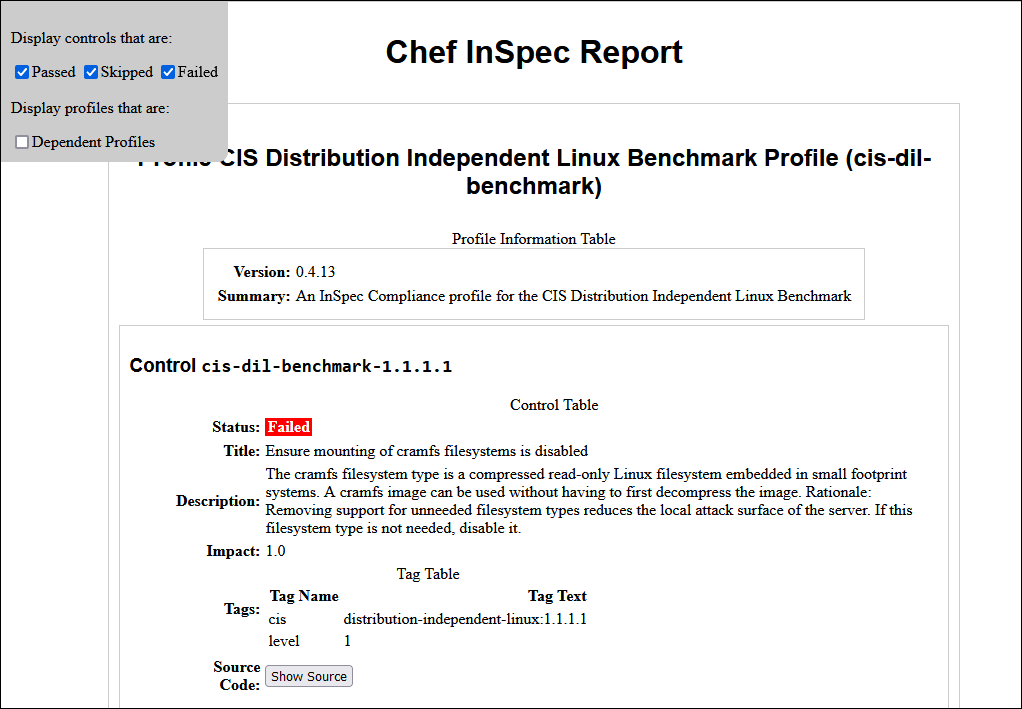
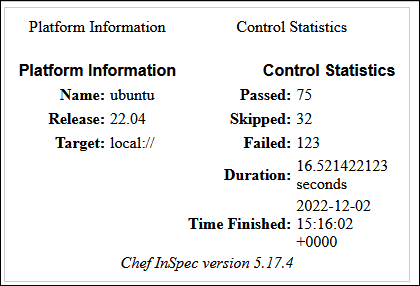
Review the results before moving on, thinking about what you would include in your audit report. Also, note the control summary at the bottom of the web page.
Optional: InSpec Benchmark Scan of Alma
Environment Check
Before proceeding, ensure that you are working in Windows Terminal in a SSH session to the Ubuntu VM.
Background: When you ran InSpec against the Ubuntu VM, it was running as a local process with your credentials. To scan remote systems, you need to authenticate using a network-based protocol. To see this in action, you can run the Distribution Independent Linux CIS benchmark against the Alma VM.
Instructions: Return to your SSH session to the Ubuntu server, or open a new session in Windows Terminal. Ensure your working directory is set to the InSpec folder in your home folder.
cd /home/student/labFiles/inspec/
Then, set up the credentials to connect to the remote Alma host. In production environments, there is usually some sort of privileged access management (PAM) tool or secrets vault available for securely storing credentials for automated tasks like this. Those tools can often be used to populate an environment variable with sensitive information so it will not be exposed on the command line (and saved in the user's shell command history). In the lab, we will simulate using a vault by populating the environment variables manually.
Populate the environment variables with the SSH credentials for Alma:
export SSHUSER=student
export SSHPASS=student
Next, you will run the same inspec profile against Alma as you did against Ubuntu earlier. The -t, or target, flag tells inspec to use SSH with your username and password to connect to the remote host for testing. Run this command to start the remote test:
inspec exec ./cis-dil-benchmark/ -t ssh://$SSHUSER:$SSHPASS@10.50.7.40 --reporter html2:/var/www/html/almaReport.html documentation | tee /var/www/html/almaReport.txt
You can review the HTML and text-based results in Firefox by pasting in these URLs, respectively:
http://10.50.7.50/almaReport.html
http://10.50.7.50/almaReport.txt
Part 4: Review Nessus CIS Compliance Scan Results
Background: Remember that the Nessus Essentials scanner used in the labs does not have the capability of running compliance audits. As in other labs, we have provided a Nessus Professional CIS benchmark scan against the Windows, Alma and Ubuntu VMs that you can import and view. In this section of the lab, you'll import this scan and prepare to explore the results.
Instructions: Open Firefox in the Windows VM and click on the bookmark for Nessus.
If prompted, log in with username student and password student.
In the Nessus user interface, click on the Import button at the top-right of the screen.

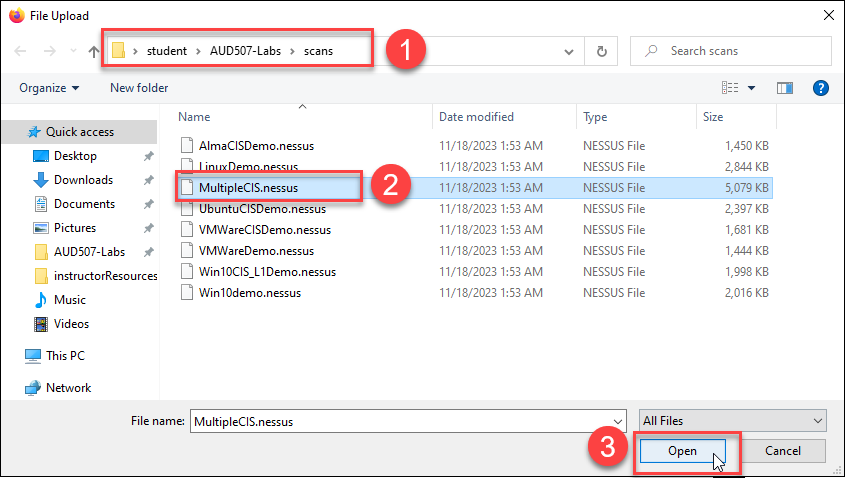
In the File Upload dialog box, navigate to the scans folder in the lab files repository (C:\LabFiles\scans), and select the file named "MultipleCIS.nessus." Click the Open button to complete the file import.
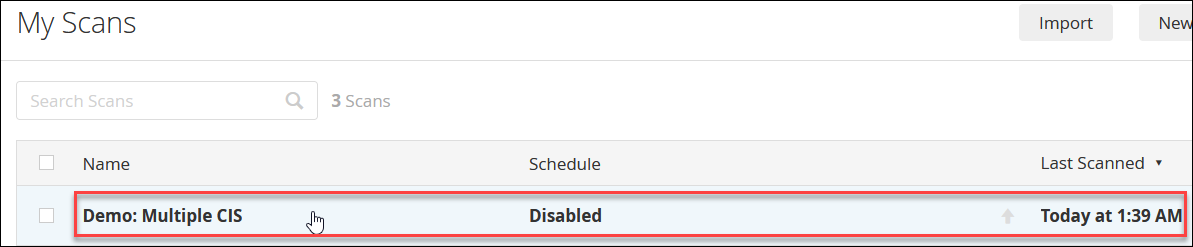
Once the import operation finishes, locate and click on the Demo: Multiple CIS scan in the list of Nessus scans. This will take you to the results for the compliance scan.
Compliance Scan review
Background: Since you get an overview of how to read Nessus compliance scan results in Lab 2.4, you will concentrate on analyzing the findings specific to the 2 Linux VMs included in the scan.
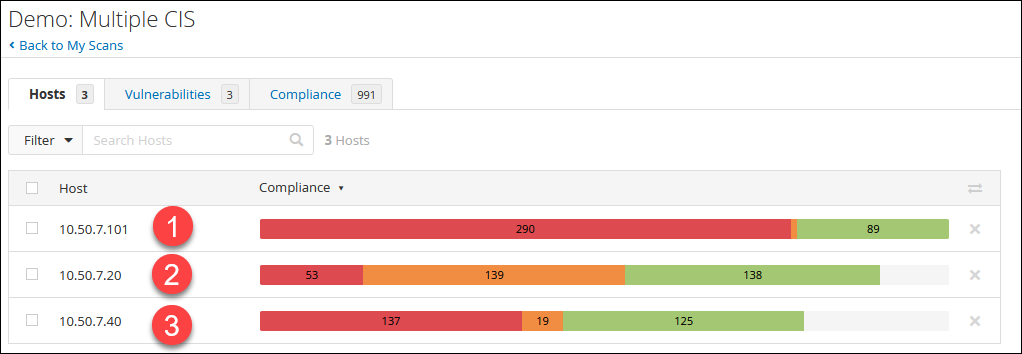
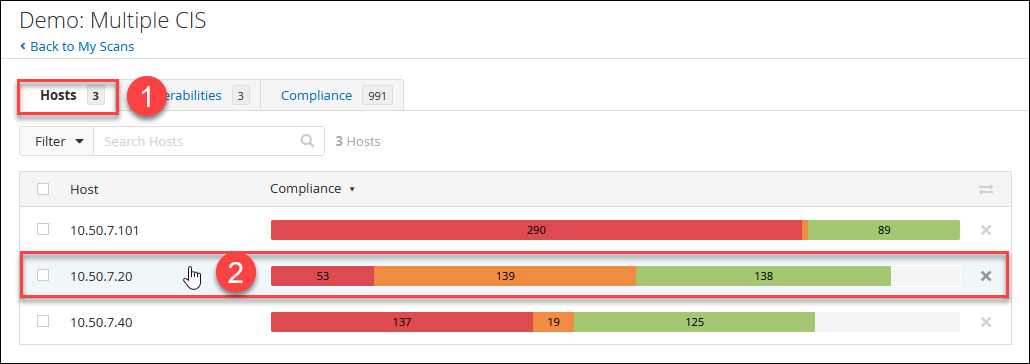
Instructions: On the Hosts tab, notice that there were three hosts included in this compliance scan. We configured the scan to use three different Nessus "audit" files, to cover the three distinct operating systems being scanned. Each audit file includes a check to ensure that it is only run against an applicable operating system. The table below describes the systems included in the scan and which audit file Nessus has applied to each of them. You'll use the Nessus output later to verify which audit files produced the results for the Linux hosts.
| # | Hostname | IP Address | Audit File |
|---|---|---|---|
| 1 | Windows | 10.50.7.101 | CIS_MS_Windows_10_Enterprise_Level_1_v2.0.0.audit |
| 2 | Ubuntu | 10.50.7.20 | CIS_Ubuntu_22.04_LTS_v1.0.0_Server_L1.audit |
| 3 | Alma | 10.50.7.40 | CIS_Distribution_Independent_Linux_Server_L1_v2.0.0.audit |
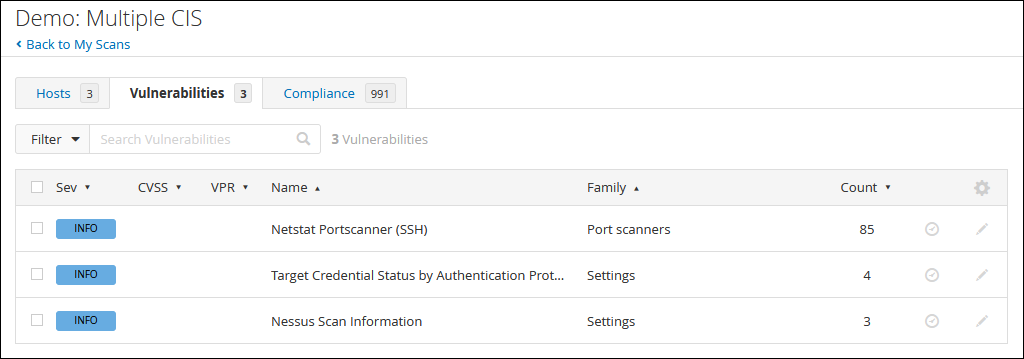
On the Vulnerabilities tab, notice that there aren't any actual vulnerabilities listed (since this is a compliance scan). Note also the lack of CVSS and VPR scores. Instead you see the plugins for port scanning, credential use, and scan information. Feel free to examine the plugin output, but since these are covered in another lab, we won't offer instructions here.
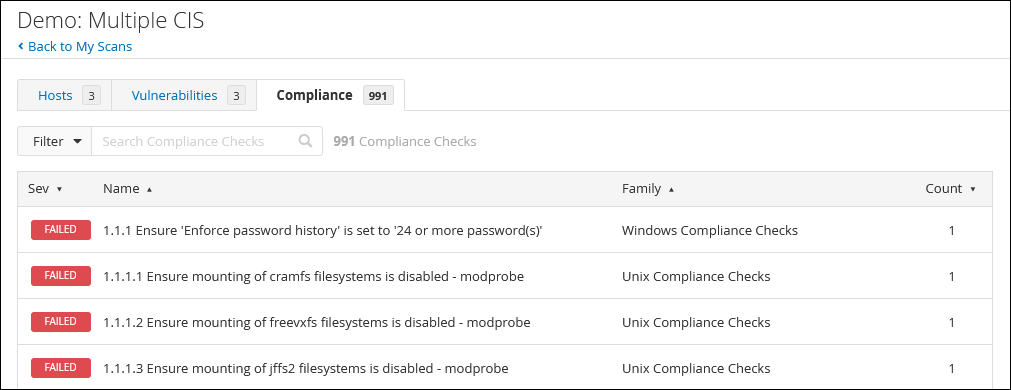
On the Compliance tab, you'll see the results of nearly 1,000 individual compliance checks which were performed against the three hosts. This view is useful for seeing an overview of compliance across the entire population under review.
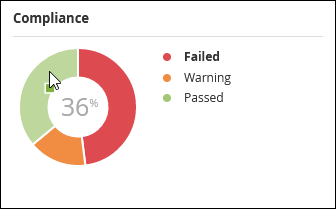
If you hover your mouse cursor over the colored bands in the donut chart on the right of the page, you will see percentages for each of the three compliance "severities:" Failed, Warning and Passed. Again, since this information is covered in another lab, we leave it to you to explore the results on this tab.
Ubuntu Compliance Results
Background: In this part of the lab, you'll examine all the sections of the report for a single compliance finding on the Ubuntu host. Optionally, you can review other findings on your own.
Instructions: Return to the Hosts tab and click on the table row for the 10.50.7.20 host, which is the Ubuntu VM.
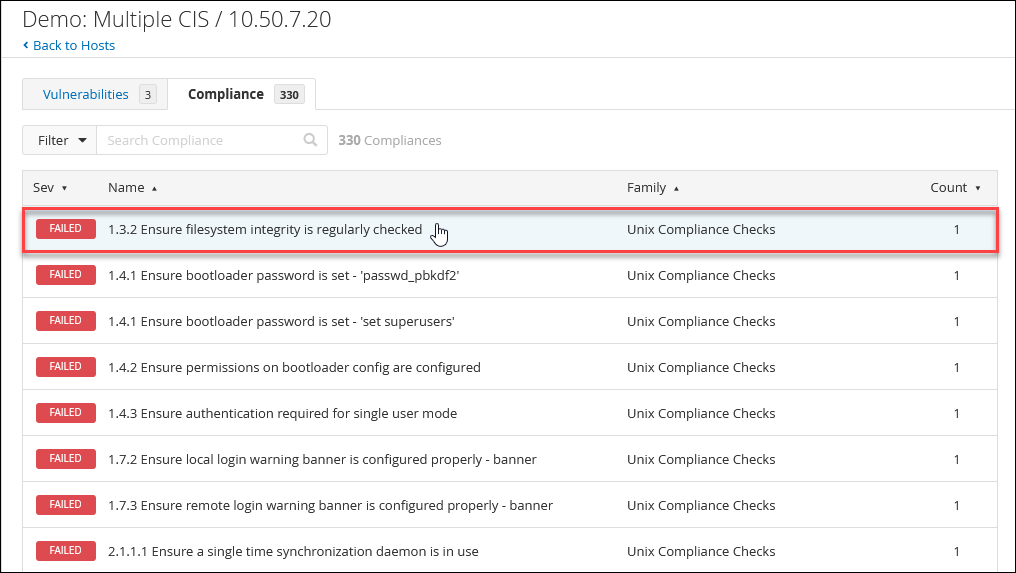
The Compliance tab shows the results of all 330 audit tests run against this host. Click on the first finding in the list, labeled 1.3.2 Ensure filesystem integrity is regularly checked.
This compliance check is designed to see if the host is running a tool called the Advanced Intrusion Detection Environment (AIDE). AIDE is a file integrity monitoring tool, similar to the Tripwire tool mentioned in the course lecture. The plugin checks the systems crontab (a Linux task scheduler) and system service configuration attempting to find a scheduled AIDE job. In this case, the plugin could not find a scheduled job to run AIDE, so the control is marked as FAILED. The Solution section of the page offers techniques for administrators to use to correct the control failure.
Audit Finding Discussion
Should this finding be included in the audit report?
While the control included in the CIS benchmark has failed, we have found in other lab exercises that the Ubuntu host used in class has the Tripwire integrity monitoring tool installed instead of AIDE.

Often during your audits, you will be expected to examine compensating or equivalent controls. In this case, you might want to interview the administrators or examine the system to see if Tripwire scans are scheduled to run at regular intervals and if administrators or the security team are alerted if the scans show unauthorized changes to the system.

*Always remember that automated tools can speed up your work, but your professional discretion, interviewing, and manual testing will be required as you conduct the audit and prepare the report.*
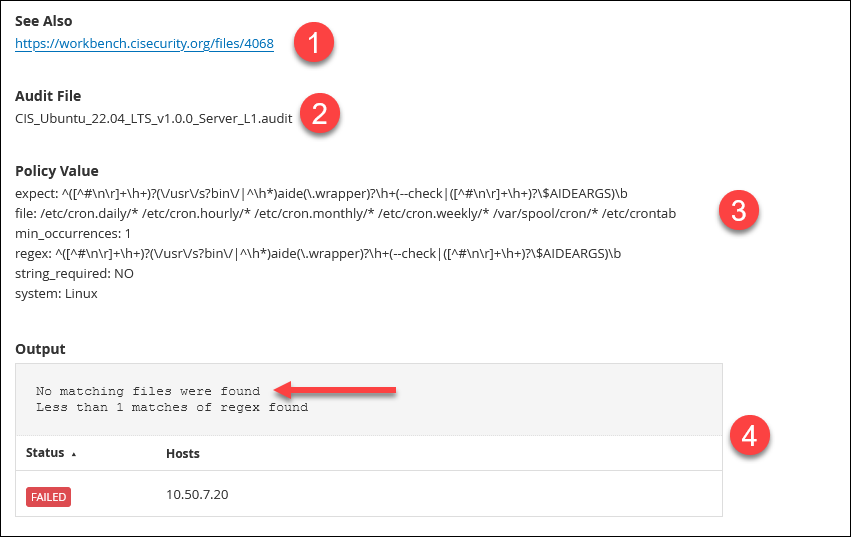
Scroll to the bottom of the findings page and notice the other sections of the compliance audit findings:
- The See Also section (#1 in the screenshot) has a link to a CIS website with more information about the benchmark control being tested. A CIS Workbench login is required to view this page.
- The Audit File section (#2) lists which Nessus audit file contained this compliance check. As we noted above, this scan included multiple audit files and multiple hosts being scanned, so this section allows you to see which file was applied for this check.
- The Policy Value section (#3) shows the files being tested by this compliance check and the regular expressions being used to test the files.
- The Output section (#4) shows the FAILED status of the test, and that the failure was caused by none of the files matching the regular expression (indicated by the arrow).
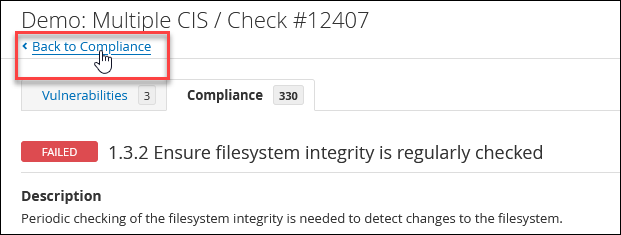
Click the Back to Compliance link to return to the Compliance tab.
One of your audit activities should be to review the PASSED and FAILED results for each of the scanned hosts. Remember from other labs that you can use the Filter function to reduce the number of results displayed in the user interface. Take as much time as you would like to review the results for Ubuntu (or either of the other scanned VMs) before you proceed with the next part fo the lab.
When you are through exploring, make sure to return to the My Scans area of Nessus by clicking on the Scans link in the Nessus header:

Part 5: Review Nessus Credentialed Scans
Background: We have included saved results from a credentialed scan of the Ubuntu and Alma VMs in the lab files on the Windows VM. In this section of the lab, you will import and review the scan results.
Instructions: If you have not already done so, open Firefox on the Windows VM, click the icon for Nessus and then log in with username student and password student.
In the Nessus user interface, click on the Import button at the top-right of the screen.
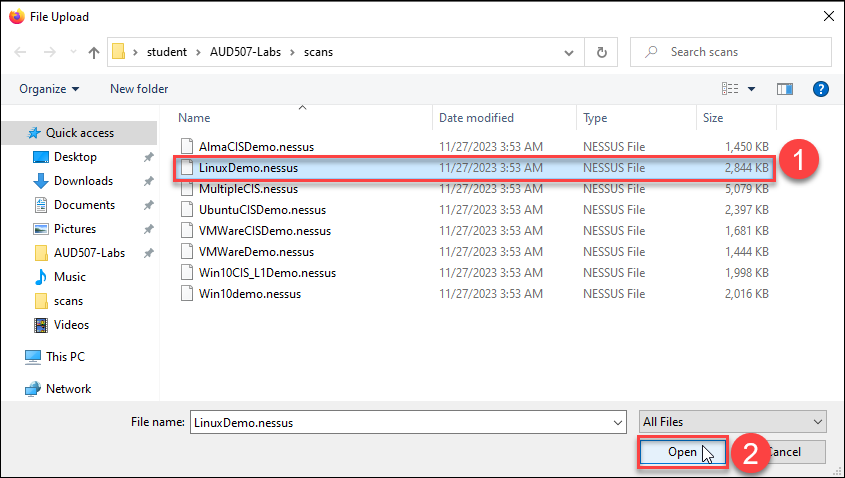
In the File Upload dialog box, navigate to the scans folder in the lab files repository (C:\LabFiles\scans), and select the file named "LinuxDemo.nessus." Click the Open button to complete the file import.
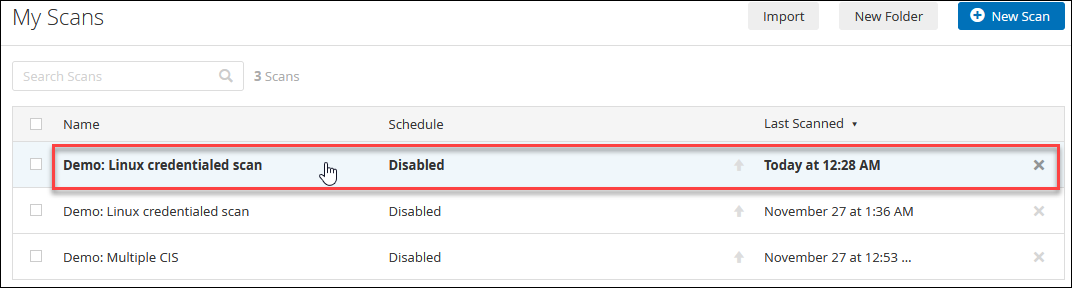
Once the import operation finishes, locate and click on the Demo: Linux credentialed scan scan in the list of Nessus scans. This will take you to the results for the credentialed scan of the Linux hosts.
Ubuntu Credentialed Results
Background: This Nessus scan contains results of credentialed checks on both Linux machines in the lab. In this section, you will analyze a few of the results from the Ubuntu VM.
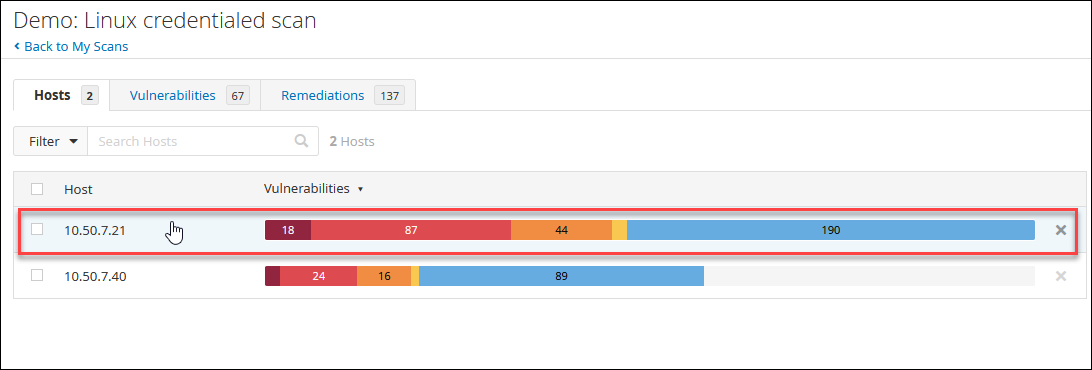
Instructions: In the Hosts tab of the scan results, click on the row for the host with IP address 10.50.7.21. This will allow you to view results for only the Ubuntu host.
Since Lab 2.4 gives you a survey of Nessus vulnerability scan results, we will focus on a few important results here.
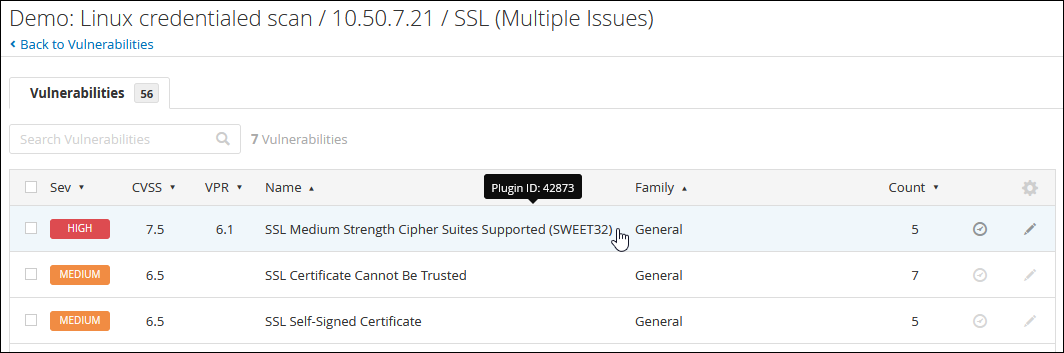
In the Vulnerabilities tab, click on the second row of the table, which is the first row labeled SSL (Multiple Issues).
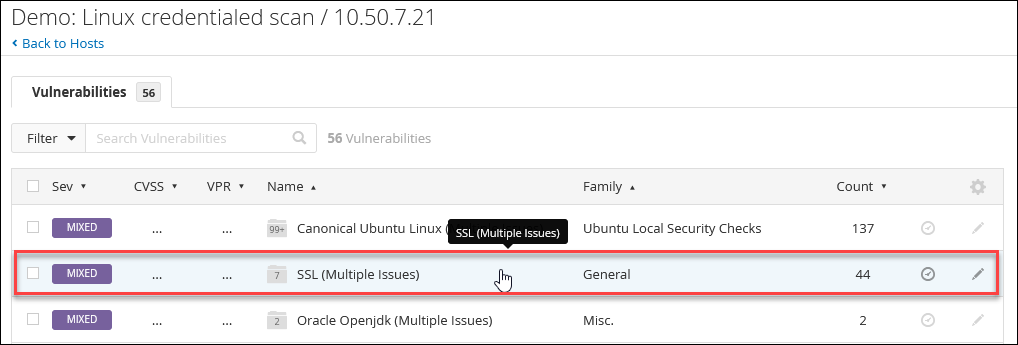
Notice the Severity, CVSS, and VPR columns which can be used to prioritize results for inclusion in your audit report and for remediation by administrators. When you have hundreds of plugin results per host, these criteria can be very useful.
Click on the first finding on the page, labeled SSL Medium Strength Cipher Suites Supported (SWEET32).
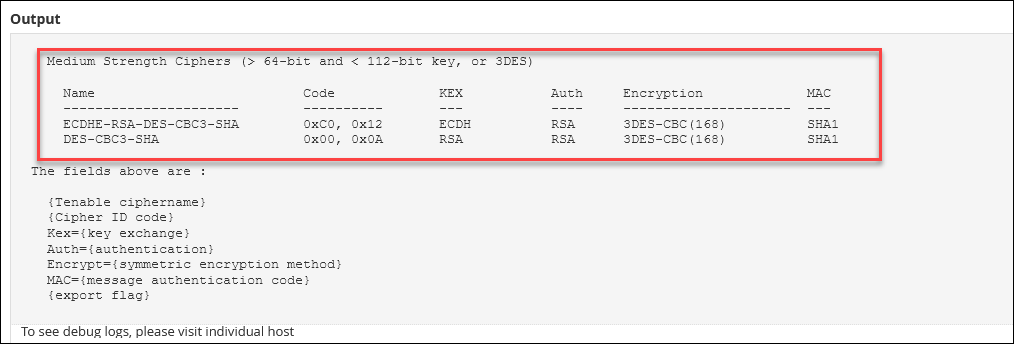
Note in the output that the host has multiple listening ports which allow use of the medium-strength 3DES encryption algorithm. The DES/3DES algorithms have been deprecated for many years now, and do not provide the level of security required for most modern systems. This finding should definitely be included in the audit report. (As a side note, there is likely an associated finding that old SSL or TLS versions are enabled on this host. We will leave this to you to research.)
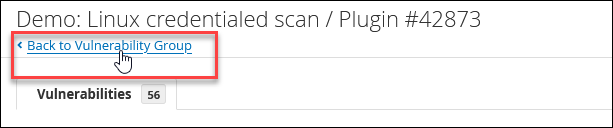
Return to the SSL vulnerability group by clicking the link at the top of the page.
Now click on the second finding on the page, labeled SSL Certificate Cannot Be Trusted.
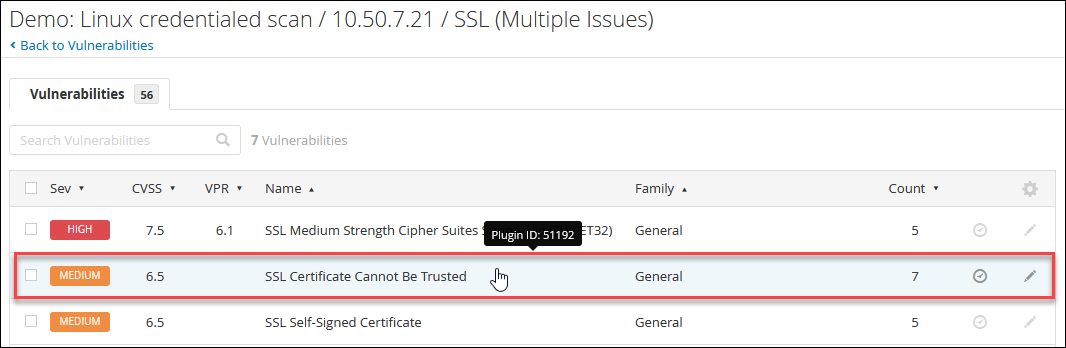
You'll see in the output for this result that there are several "self-signed" TLS/SSL certificates installed on the host. Self-signed certificates should be avoided, since they will not be trusted by any web browsers, and may serve to train our users and administrators to fall victim to machine-in-the-middle attacks.
Audit Finding Discussion
Should this finding be included in the audit report?
While self-signed certificates are always worthy of including in your report, there is a type of *false-positive* result for plugin 51192 that we see frequently on real audits. Many organizations have their own internal certificate authorities (CAs) that they use to issue certificates to internal systems. They will often use Windows Group Policy objects to install the CA certificates on their Windows systems. Certificates created by these CAs are perfectly valid and should not cause an audit finding.
Nessus can be configured to trust your internal CA by installing the certificate on the Nessus scanner. This can be done from command line, or in the Nessus UI Settings page. A screenshot of this page is below. You would simply need to paste the CA certificate into the textbox and click the `Save` button.

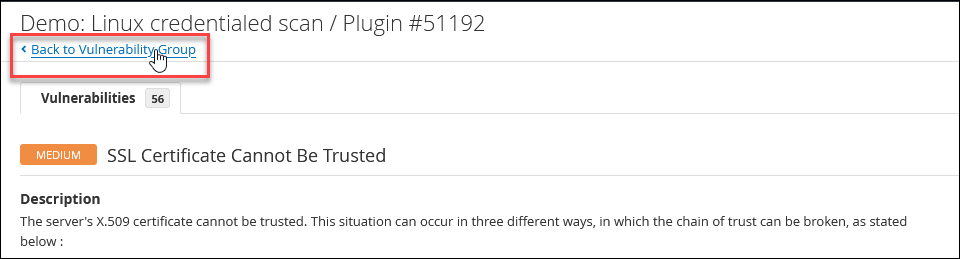
Return to the SSL vulnerability group by clicking the link at the top of the page, and then return the the Vulnerabilities tab by clicking on the Back to Vulnerabilities link.

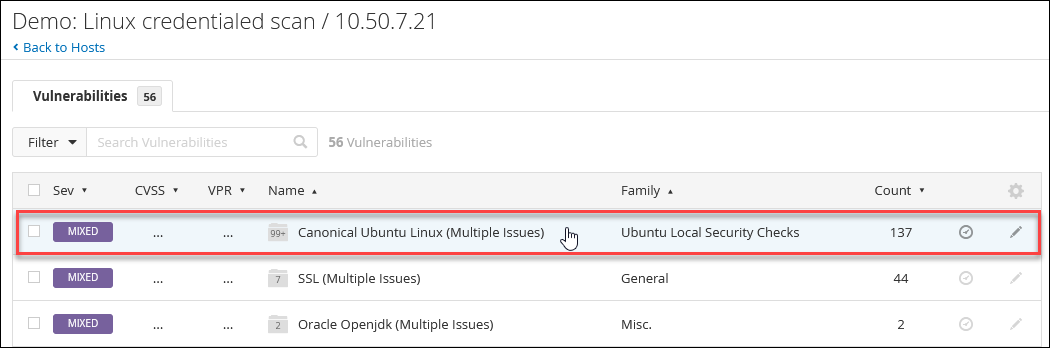
In the Vulnerabilities tab, click on the first row of the table, labeled Canonical Ubuntu Linux (Multiple Issues).
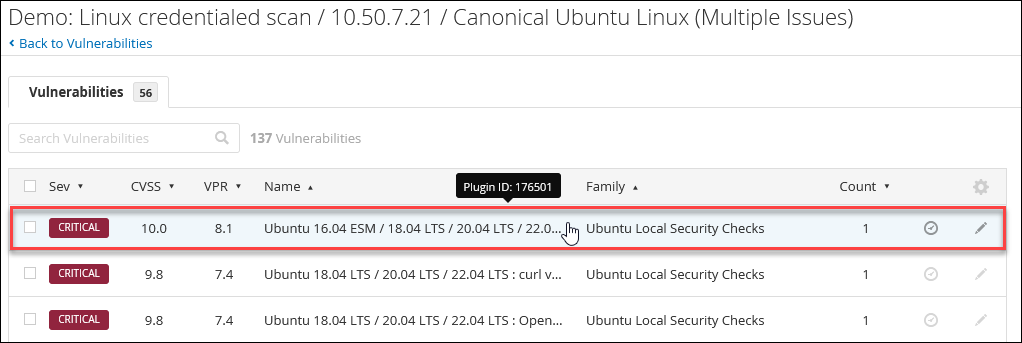
Then, click on the first finding on the page.
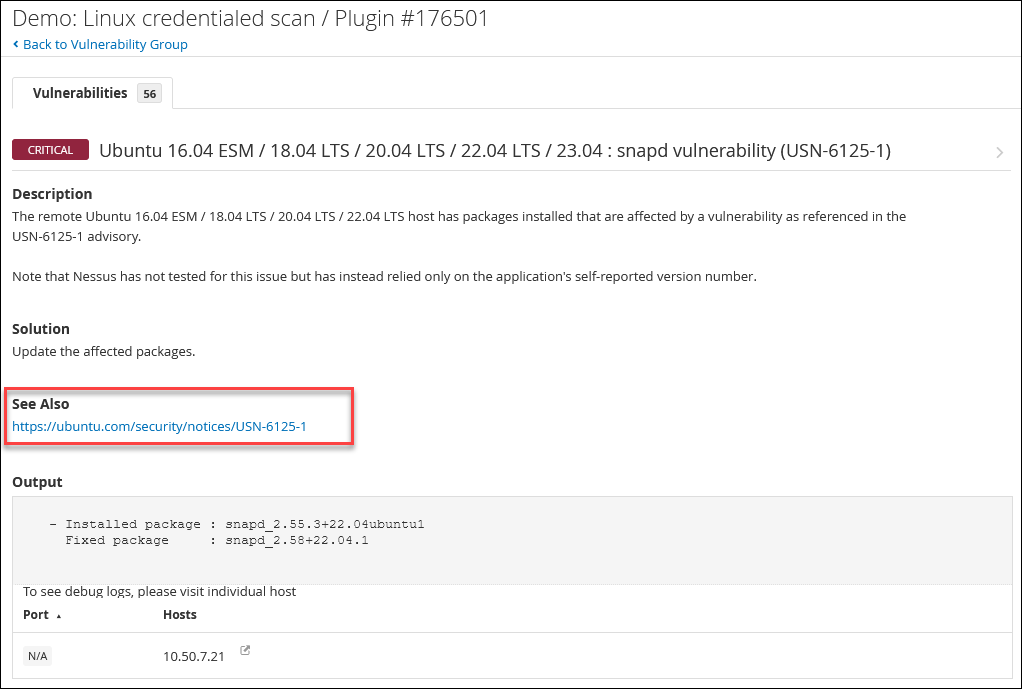
This vulnerability page looks like many you have seen before, but please notice that the See Also section links to what's known as a USN, or Ubuntu Security Notice. These standardized vulnerability reports are very similar to the Microsoft Knowledge Base (KB) articles released for Windows systems. Feel free to click on the link to view the notice for this finding.
Return to the SSL vulnerability group by clicking the link at the top of the page, and then return the the Vulnerabilities tab by clicking on the Back to Vulnerabilities link.
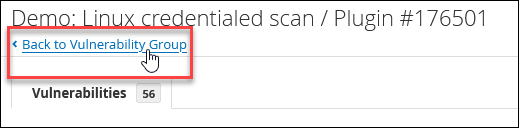

Using the techniques you learned elsewhere, try to find the output for these plugins:
Nessus Scan Information (Plugin ID 19506) Check to see that credentialed scans were run.
Solution
Click the Filter button on the Vulnerabilities tab.
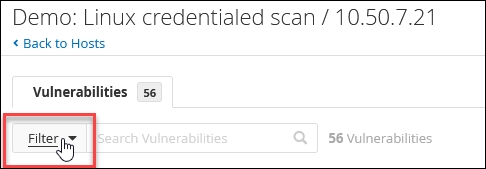
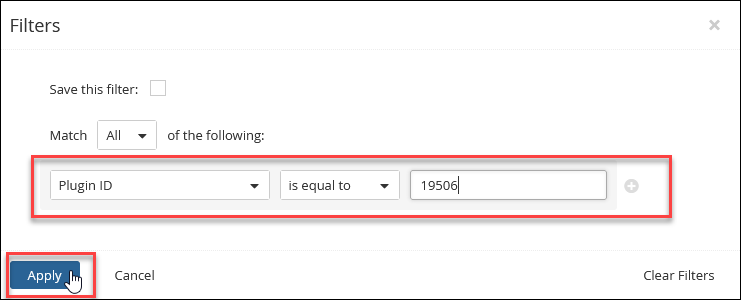
Set a filter for a Plugin ID which is equal to 19506 and then click the Apply.
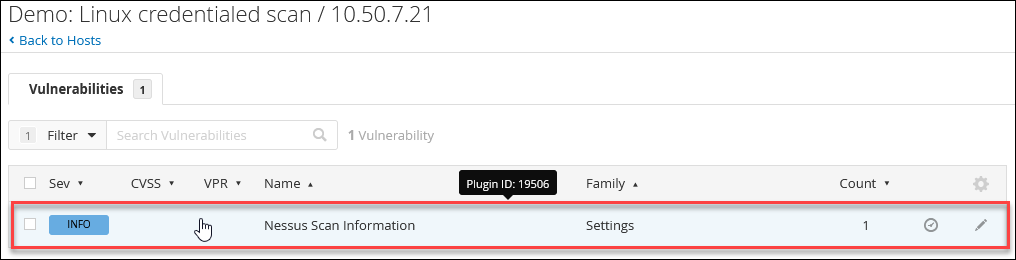
Click the row for the plugin output button to view the result.
Click the more... link to expand the output section, and find the Credentialed Checks line. In this case, the scan used credentialed checks, and the scanner recognizes that it is scanning itself.
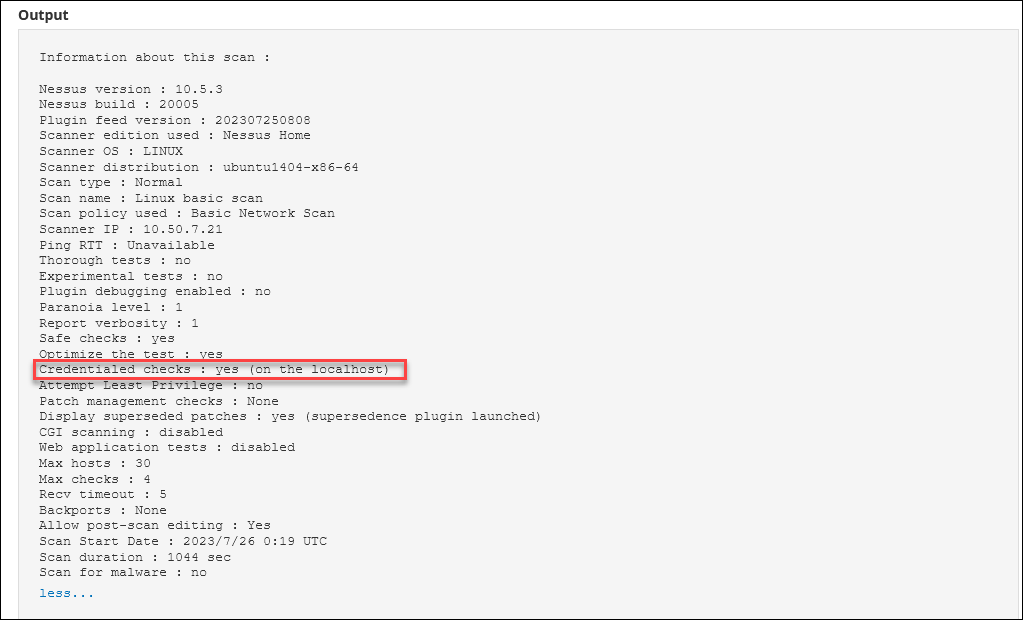
Click the Back to Vulnerabilities link at the top of the page after you finish reading the plugin output.
OS Identification (Plugin ID 11936) Try to identify in this plugin:
- The Linux Distribution version
- The Linux kernel version
- The version of OpenSSH installed on the host
Solution
Using the Filter button, change and apply the filter to look for Plugin ID 11936.
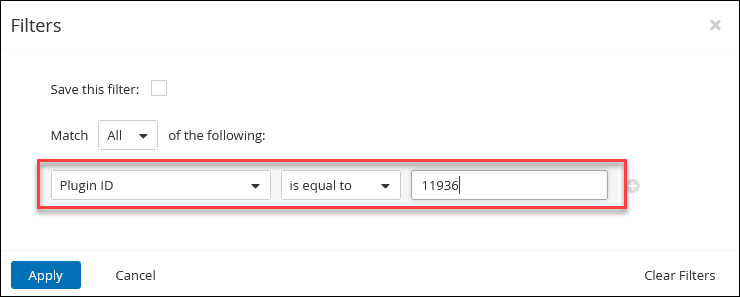
Click the OS Identification row to view the plugin output. Expand the Output with the more... link to find the answers:
- The Linux Distribution version: Ubuntu 22.04 (#1 in the screenshot below)
- The Linux kernel version: 5.15.0-30-generic (#2 in the screenshot below)
- The version of OpenSSH installed on the host: SSH-2.0-OpenSSH_8.9p1 (#3 in the screenshot below)
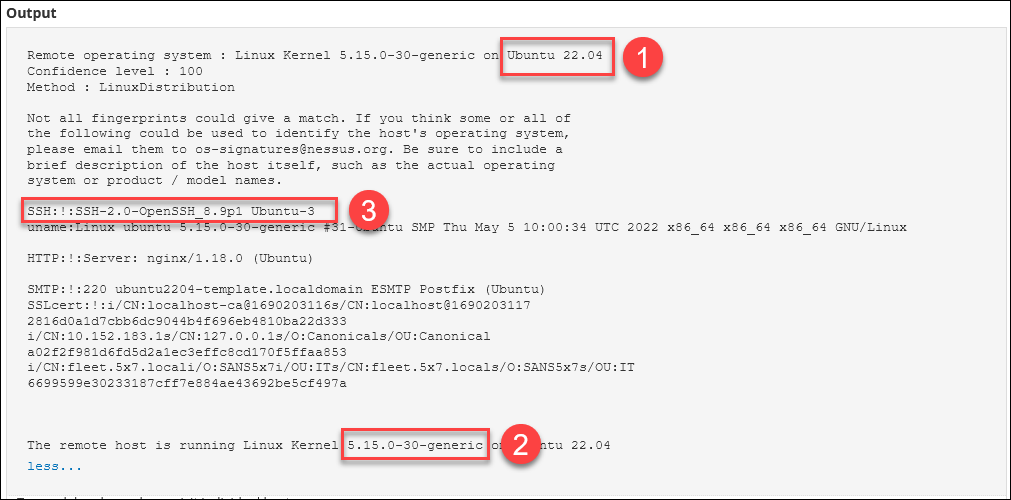
Click the Back to Vulnerabilities link at the top of the page after you finish reading the plugin output.
Patch Report (Plugin ID 66334) Find a full list of missing OS patches.
Solution
Using the Filter button, change and apply the filter to look for Plugin ID 66334.
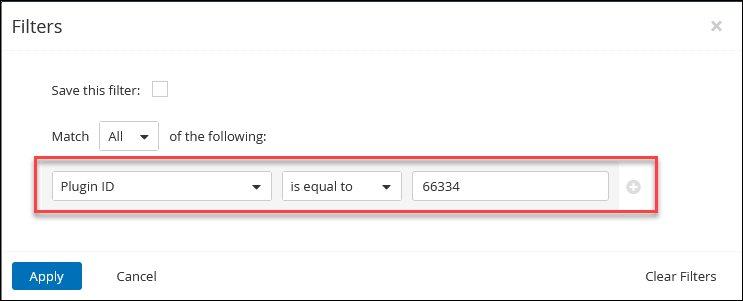
Click the Patch Report row to view the plugin output. Use the more... button to expand the plugin output and review the list of patches. It's too long to list here, but you should find over 100 missing patches on this host!
Click the Back to Vulnerabilities link at the top of the page after you finish reading the plugin output.
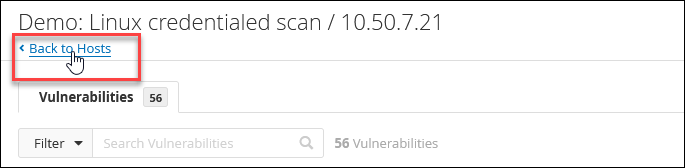
When you are through exploring, make sure to return to the Hosts tab for the scan by clicking on the Back to Hosts link at the top of the page:
Optional: Alma Credentialed Results
Background: This section of the lab allows you to explore the credentialed scan findings for the Alma VM on your own. The Alma host has an IP address of 10.50.7.40.
Instructions: Using the techniques you learned elsewhere, try to find the output for these plugins on the Alma host:
Nessus Scan Information (Plugin ID 19506) Check to see that credentialed scans were run.
Solution
You should find in the output for this plugin that credentialed checks were successful:
Credentialed checks : yes, as 'student' via ssh
OS Identification (Plugin ID 11936) Try to identify in this plugin:
- The Linux Distribution version
- The Linux kernel version
- The version of OpenSSH installed on the host
Solution
You should find in the output for this plugin:
- The Linux Distribution version: AlmaLinux release 8.6 (Sky Tiger)
- The Linux kernel version: 4.18.0-372.32.1.el8_6.x86_64
- The version of OpenSSH installed on the host: SSH-2.0-OpenSSH_8.0
Patch Report (Plugin ID 66334) Find a full list of missing OS patches.
Solution
You should find in the output for this plugin that there are around 27 patches missing from the host.
When you are finished exploring, make sure to return to the My Scans area of Nessus by clicking on the Scans link in the Nessus header:
Part 6: (Optional - On your own) Review Your Credentialed Scan Results
Background: If you chose to run the authenticated vulnerability scan earlier in this lab (and the scan has finished running - they can take some time to run), then you can explore the results on your own, using the techniques and plugins discussed elsewhere in the lab.
Instructions: If you have not already, launch Firefox on the Windows VM and log onto Nessus using the username student and password student.
Ensure you are in the My Scans area of Nessus by clicking on the Scans link in the Nessus header:
Find and click on the Linux basic scan scan that you started in the earlier lab and review the findings using the techniques discussed in class and in the other lab sections.
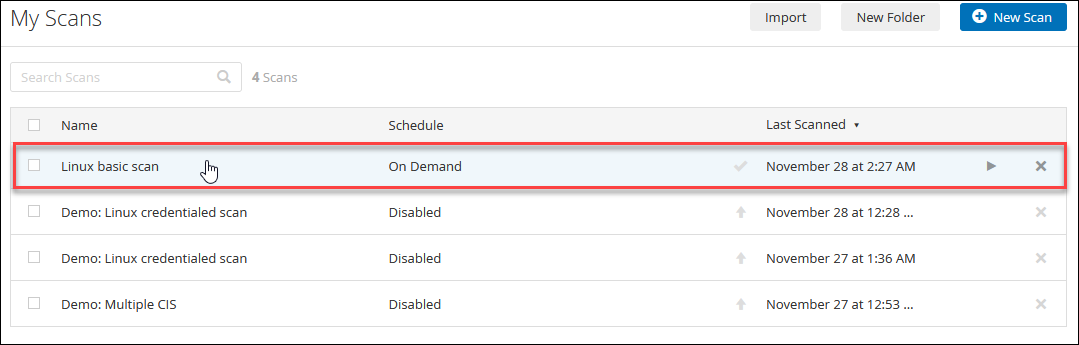
Analyze the results any way you want. Remember that this scan was run against your live hosts, so the results will very likely differ from the examples you've looked at elsewhere in the lab.
Close Firefox
When you have finished with Nessus, you can safely close the Firefox browser.