Lab 1.1: Tool Setup
Objectives
- Log on to the student lab pod.
- Set up and test course tools.
Overview
You should have been given instructions to logon to your Windows VM by your instructor. If you do not have those details, please stop here and request them from the instructor or facilitator.
This course uses many hands-on labs throughout the week to reinforce students' understanding of the material discussed in class. We provide a Windows 2025 Datacenter virtual machine for students to use for performing labs and other virtual machines that will serve other purposes in the labs. The labs are designed to simulate an enterprise network environment, and the virtual machines represent systems that might typically be encountered in an enterprise.
Part 1: Logon to the Windows VM
Use your remote desktop client to connect to the IP address provided for you with your class materials. Use the username and password provided to logon to the system.
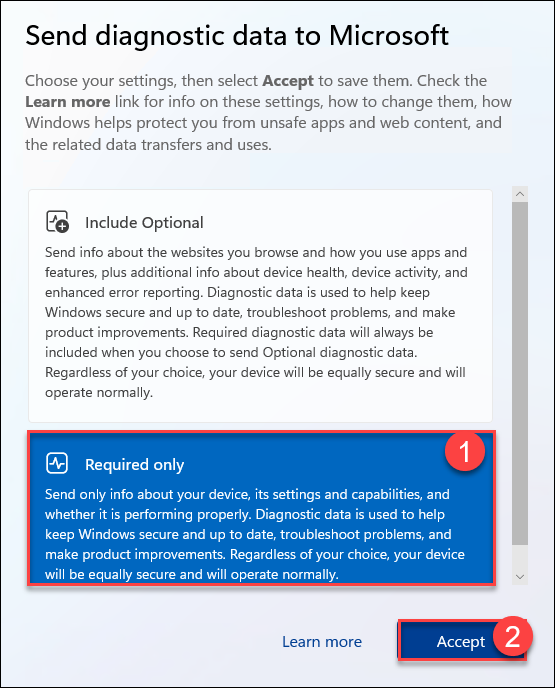
After you have successfully authenticated, you will be presented with a privacy settings screen. Choose Required only and then click the Accept button.
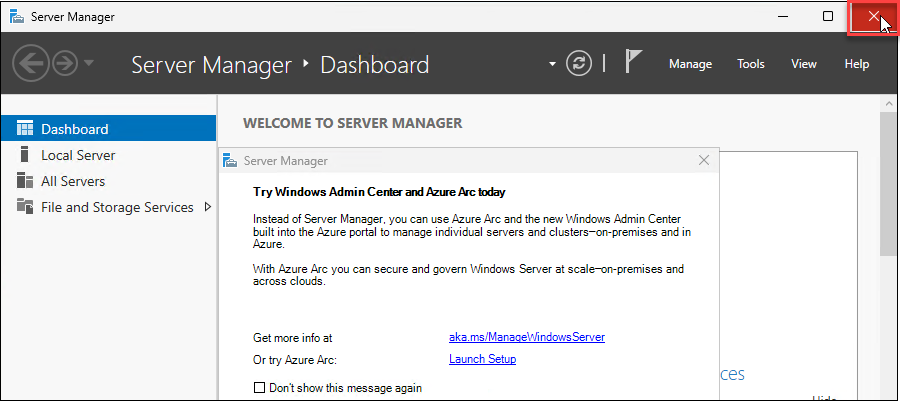
Server Manager will launch by default after dismissing the privacy settings. Close it by clicking the red X in the upper-right corner.
Part 2: Tools Setup on the Windows VM
Background: The Windows VM is built using automated tools in a continuous integration pipeline. Because of this, some of the tools you will use during your labs have been installed, but not yet fully configured. During this and following sections of the lab, you will complete some simple tool configuration steps.
Instructions:
The Windows virtual machine for this class was built using automated tools, and you are the first person to ever log onto it. Your engineers have created a script which will configure start menu and taskbar shortcuts and will copy customized configurations for your audit tools.
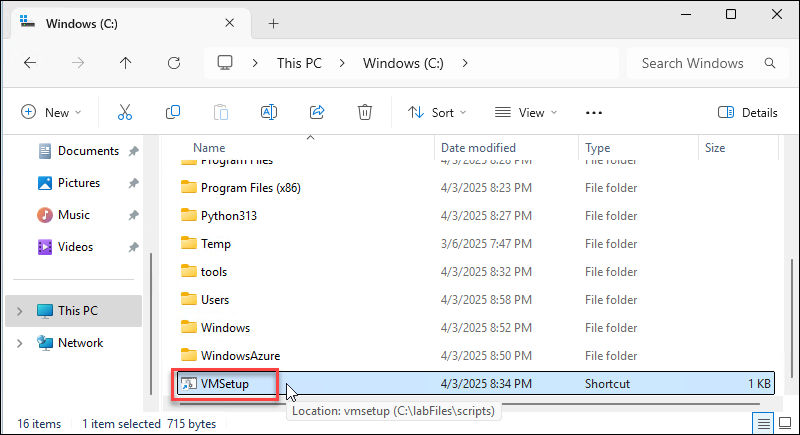
Locate and double-click the VMSetup.lnk file in the root directory of the C: drive.
Detailed instructions
Open File Explorer by clicking its icon on the taskbar.
TODO: Images here
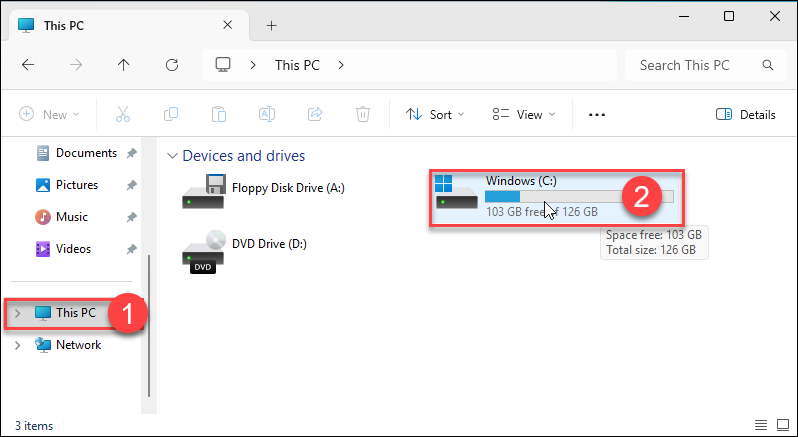
Click on the icon for This PC and then double-click on the Windows (C:) drive.
Locate and double-click on the VMSetup file icon
The setup script will make a number of changes to the system and then perform an automatic reboot and disconnect your remote desktop session. There is no need to close the dialog box presented, as the VM will reboot regardless.
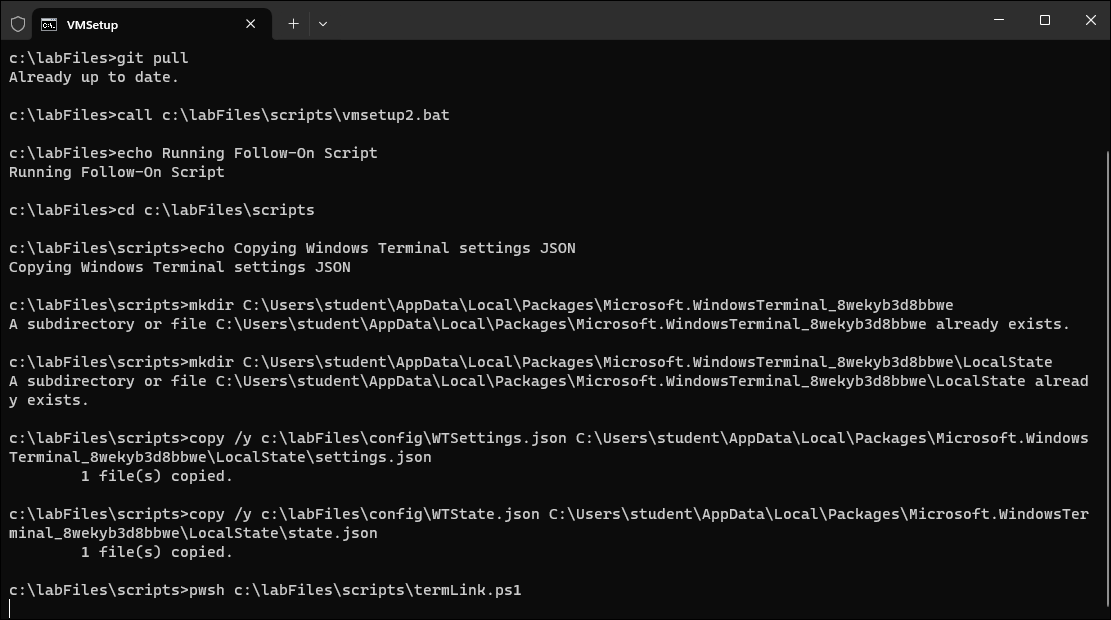
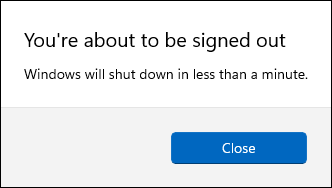
Allow a minute or two for the reboot to finish, then reconnect and log back into the Windows VM before proceeding.
Part 3: Set Up Firefox for Lab Use
Background: You'll use the Firefox browser for all web page access during the labs. We've pre-installed some Firefox extensions to make some of your audit tasks easier. In this section of the lab, you will set Firefox as your default browser, launch Firefox and configure two of the plugins for use.
Instructions:
Start Firefox
Find and click on the Firefox icon in the taskbar of the Windows VM. On its first launch, Firefox will open several tabs (usually four of them) as it downloads and configures the plugins you'll use in later labs, so wait a few seconds until it seems that no new tabs are being opened by Firefox, then proceed with the following instructions.

Set Up FoxyProxy Extensions
During your web application audit, you will use the Burp interception proxy to analyze and manipulate web traffic. We have installed an add-on in Firefox, known as "FoxyProxy," which lets the user quickly change the browser's proxy settings. We have included a settings file for FoxyProxy, which you will import into Firefox during this section of the lab.
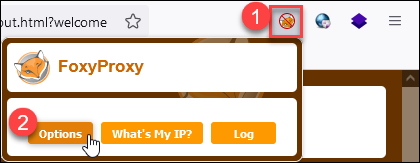
In Firefox, click on the FoxyProxy icon in the upper-right corner of the browser to open the FoxyProxy menu and click on the Options button.
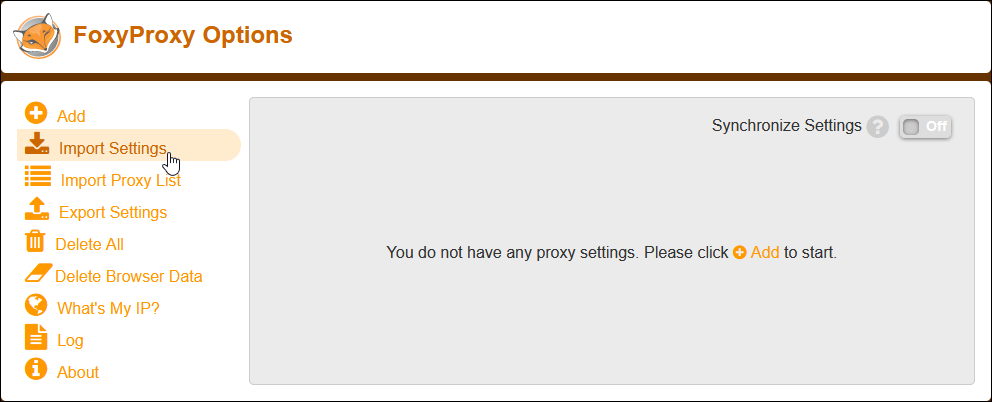
On the options page, click on the "Import Settings" icon.
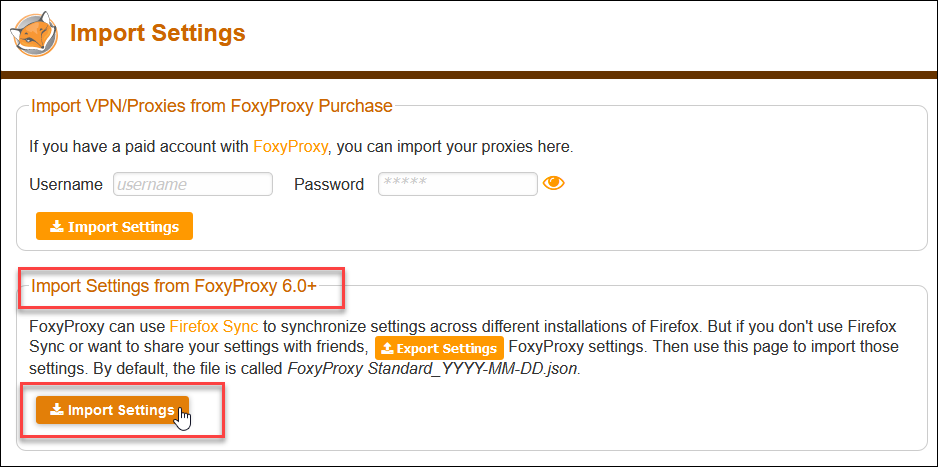
On the Import Settings page, find the section labeled Import Settings from FoxyProxy 6.0+ and click the Import Settings button.
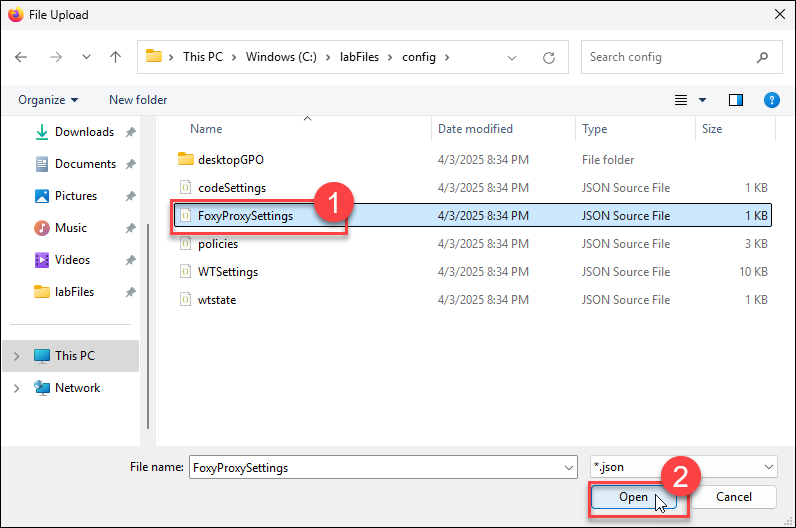
Browse to the C:\labFiles\config folder and select the FoxyProxySettings.json file. Then click the Open button.
C:\labFiles\config
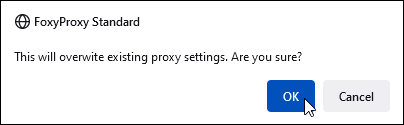
When prompted, click OK to verify the import.
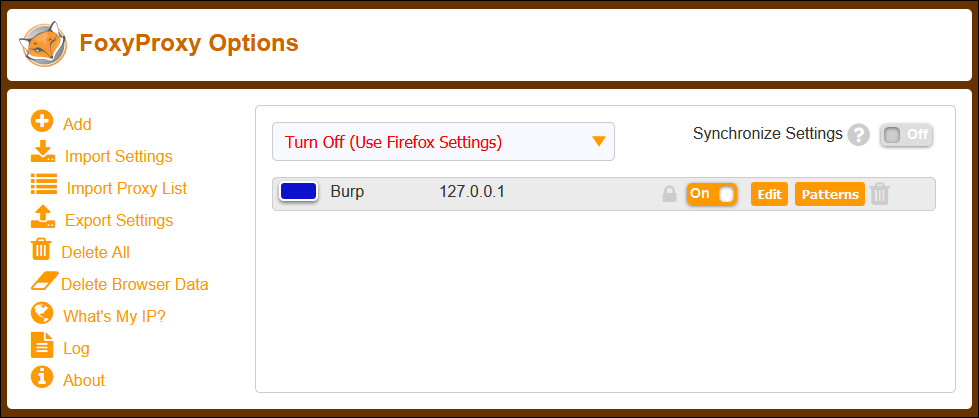
If the import is successful, you will see a screen like this. If your screen looks different, contact your instructor or facilitator for help before proceeding.
Close the FoxyProxy Options tab when you have finished.
Accept Wappalyzer Data Forwarding
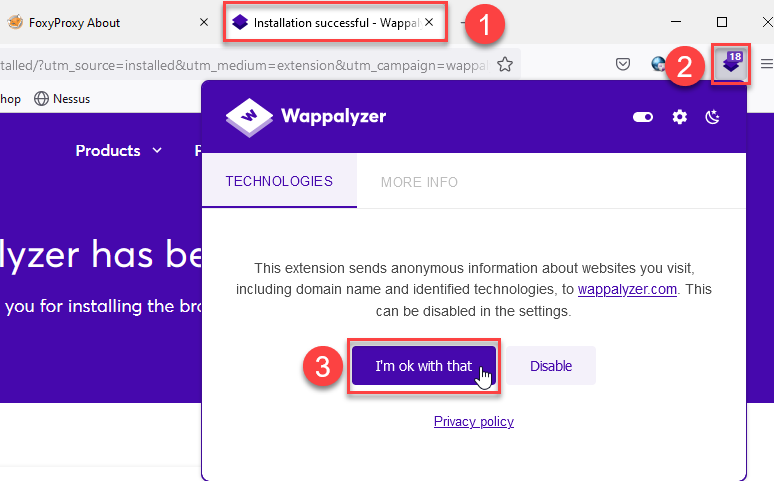
Find and click on the Installation Successful tab for the Wappalyzer Firefox extension. You'll use this extension in the web application portion of the course, so your administrators have preinstalled it in your browser. You'll need to accept the terms for the extension before using it.
Locate and click on the purple Wappalyzer icon to the right of the URL bar. Click the I'm ok with that button to allow Wappalyzer to forward usage information.
Close the Wappalyzer tab when you have finished.
Part 4: Setup Nessus Essentials
Background: Many of the labs in this course will make use of the Nessus Essentials vulnerability scanner. In this section, you will apply a license to the scanner and allow it to download and install plug-ins.
Instructions: In Firefox on the Windows VM, click the Nessus link in the bookmarks bar.

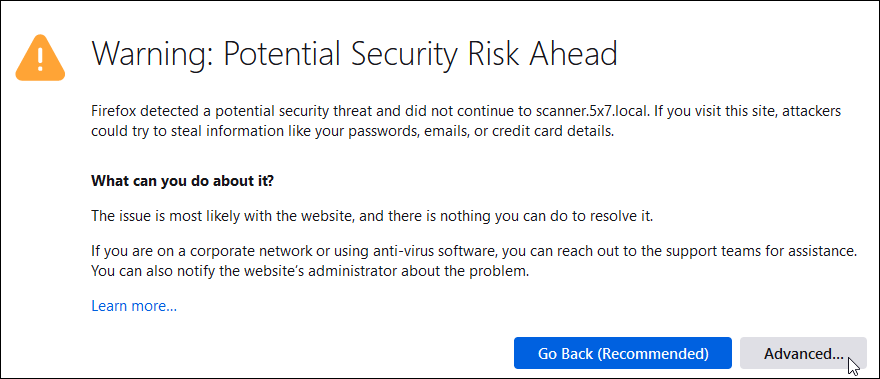
Firefox will warn you that the Nessus server is using a "self-signed" certificate for TLS communications. While this would warrant a recommendation to install a certificate signed by a trusted provider on a real audit, we will accept the warning and proceed. Click the Advanced button to see the options required for accepting the certificate.
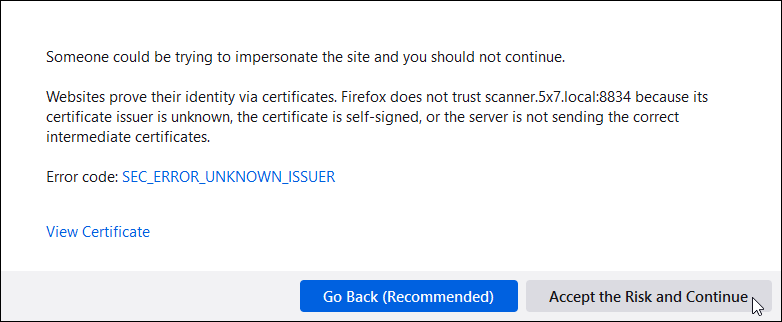
Next, click the Accept the Risk and Continue button to proceed to the Nessus website.
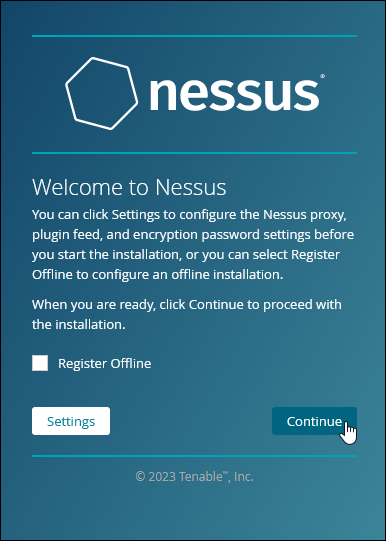
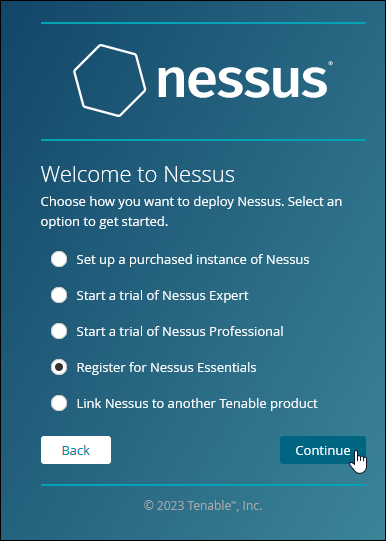
On the welcome page, click Continue to accept Nessus Essentials as the product to install. Nessus Essentials is free for home and educational use and is limited in the types of scans it can perform (for instance, compliance scans are not allowed) and the number of hosts (no more than 16) it is allowed to scan. We will use it in several of the labs throughout the course.
On the next page, click Register for Nessus Essentials to move to the registration page.
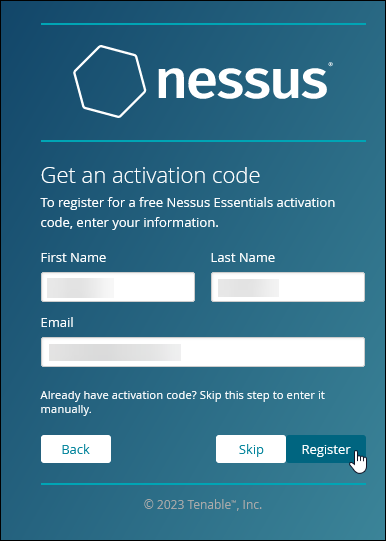
Register using your name and email address and then click the Register button.
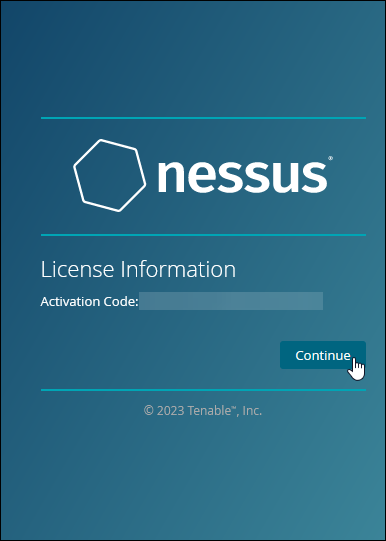
On the registration results page, you can copy and save the activation code to a text file if you would like to have a backup. Then, click the Continue button to move to the next step.
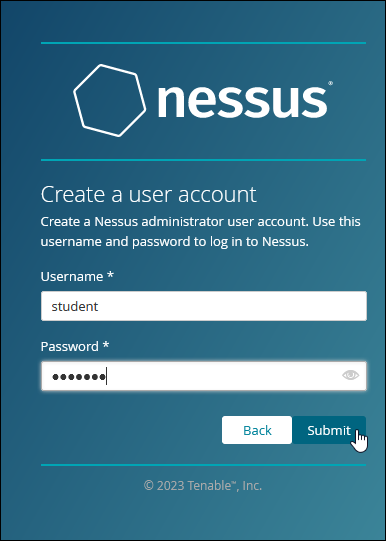
When prompted to create a user for Nessus, use the following credentials:
Username:
student
Password:
student
You will use these credentials in future labs to authenticate Nessus before running and reviewing scans. Click Submit after you have entered the credentials. If prompted by Firefox to save the password, it is okay to click Don't Save.
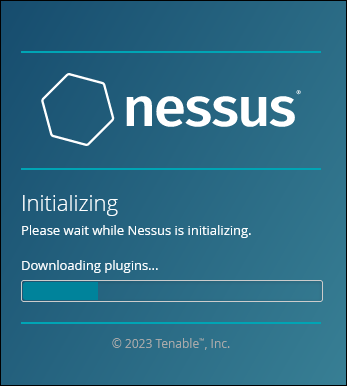
Nessus will now begin a long process of downloading and compiling plug ins for use in the scanner. When you see that Nessus is downloading or compiling the plug ins, you can close the Firefox browser, and Nessus will continue running and will complete its setup on the Ubuntu server.
Part 5: Set Up OpenOffice Software
Background: We've included OpenOffice software to allow you to view many common business file formats. Before it can be used in the lab, you will need to let it run its startup wizard.
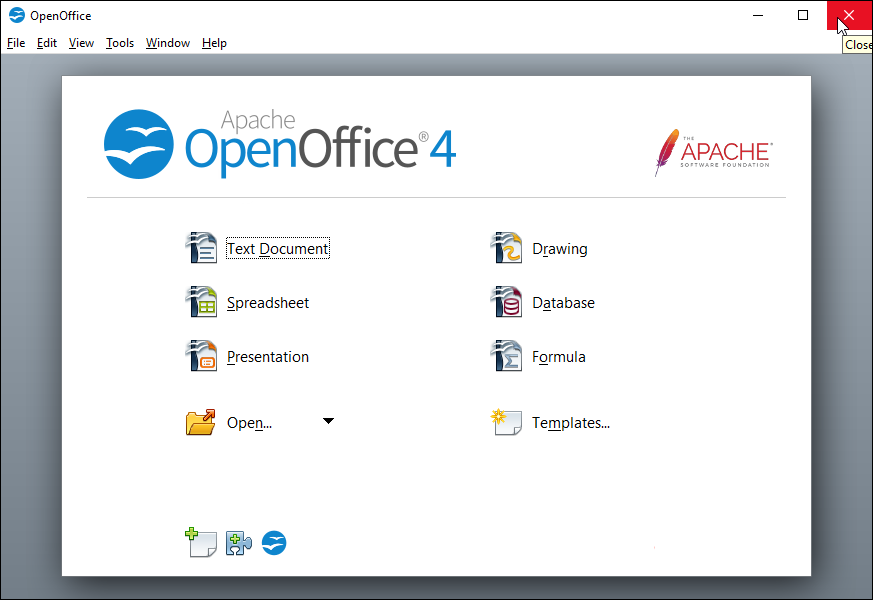
Instructions: Open the OpenOffice software by double-clicking its icon on the desktop.
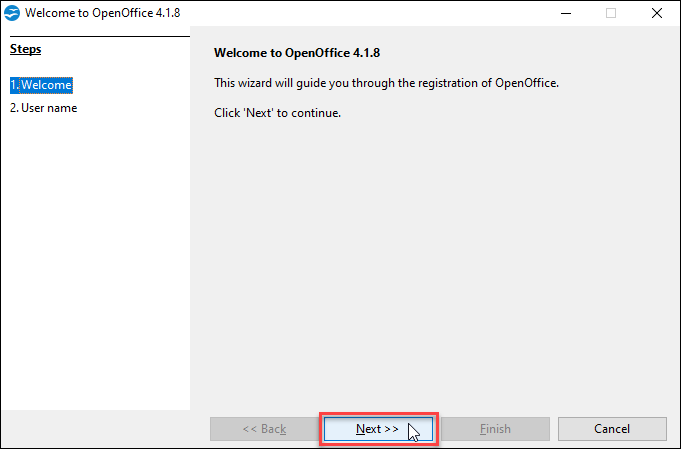
When presented with the "Welcome to OpenOffice" screen, click on Next.
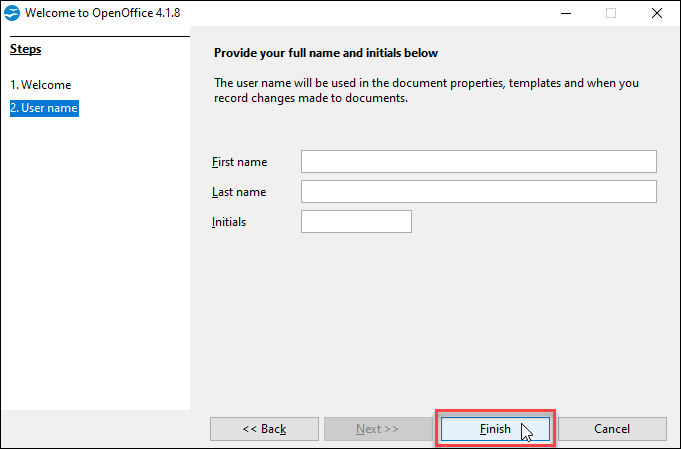
There is no need to enter any information into the next screen. You can simply click the Finish button to finish the setup.
Once you are presented with the OpenOffice splash screen, you can safely close OpenOffice. It is now ready for the labs that follow.
Part 6: Set Up AWS Access on Windows
Preparation:
Background: Many of the lab exercises for the course will have you performing audit tasks against cloud-based lab environments. In this section of the lab, you will use credentials provided in your course materials to configure authentication for the AWS lab.
Instructions: Locate the credentials that were issued to you for this class. You will use these credentials to configure access to the cloud service providers. You will have separate credentials for the AWS and Azure target environments.
Launch a PowerShell Core terminal on the Windows VM by clicking the Windows Terminal icon in the taskbar.

Environment Check
Before proceeding, ensure that you are working in Windows Terminal in PowerShell Core.

If you receive any errors on any of these commands, then STOP at that step and contact your instructor or TA for help before proceeding!
Using the AWS Access Key ID and AWS Secret Access Key provided by your instructor, run the command to create a default profile for the AWS CLI. Enter us-east-2 for the region and json for the output format when prompted. NOTE that the region and output format are all lowercase. This matters!
aws configure --profile default
us-east-2
json
Sample Results
PS C:\Users\student> aws configure --profile default
AWS Access Key ID [None]: ####################
AWS Secret Access Key [None]: ########################################
Default region name [None]: us-east-2
Default output format [None]: json
Test that the credentials are working by using the AWS CLI to retrieve data about the identity which you are using to connect. This command is a good "hello world" test to ensure you have the correct credentials entered.
aws sts get-caller-identity
Sample Results
PS C:\Users\student> aws sts get-caller-identity
{
    "UserId": "####################",
    "Account": "############",
    "Arn": "arn:aws:iam::############:user/student-abcde"
}
Stop if You Receive Errors!
If you receive an error when running the command above, re-run the aws configure --profile default command from above and be sure that you are using the AWS Access Key ID and AWS Secret Access Key provided by your instructor. These are NOT the same as the username and password! Do not move on with the rest of the lab until you have resolved any errors. Contact your instructor or TA for help.
Validate the Windows Lab Setup
To validate that the setup steps you've done so far on the Windows have been successful, you can run a set of "unit tests" included in the lab files repository. To setup and run the tests using the Pester PowerShell module, run these commands:
$config=New-PesterConfiguration
$config.Output.Verbosity='detailed'
$config.Run.Path='C:\labFiles\pester\Windows.Setup.tests.ps1'
Invoke-Pester -Configuration $config
Note that the tests import several PowerShell modules and may take some time to run.
Sample Results - Truncated
PS C:\Users\student> $config=New-PesterConfiguration
PS C:\Users\student> $config.Output.Verbosity='detailed'
PS C:\Users\student> $config.Run.Path='C:\labFiles\pester\Windows.Setup.tests.ps1'
PS C:\Users\student> Invoke-Pester -Configuration $config
Pester v5.5.0

Starting discovery in 1 files.
Importing AWSPowershell.NetCore
Import complete
...
[Results Truncated]
When the tests have finished, ensure that the Failed, Skipped, and NotRun numbers are all ZERO. If this is not the case, please contact your instructor or TA for help.
Sample Results
Tests completed in 42.03s
Tests Passed: ##, Failed: 0, Skipped: 0, Inconclusive: 0, NotRun: 0
Part 7: Set Up AWS Access on Ubuntu
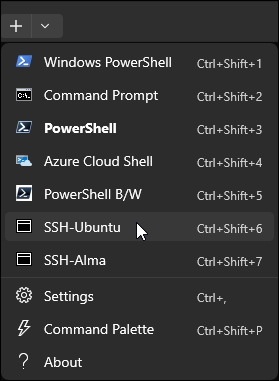
Preparation: Open an SSH connection to the Ubuntu VM in Windows Terminal. Click the down arrow icon and select SSH-Ubuntu from the drop-down menu.
Environment Check
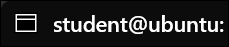
Before proceeding, ensure that you are working in Windows Terminal in a SSH session to the Ubuntu VM.
Background: In an effort to show you the BEST audit tools and techniques, the labs will make use of software installed on the Windows and Ubuntu (Linux) virtual machines during the course labs. In this section of the lab, you will configure AWS and Azure credentials on the Ubuntu VM.
Create AWS Profile
Instructions:
Create a profile for the AWS CLI using the same credentials and settings you used on the Windows VM. Set your region to us-east-2 and your output format to json. Remember to use lowercase for those two settings.
aws configure --profile default
us-east-2
json
Sample Results
student@ubuntu:$aws configure --profile default
AWS Access Key ID [None]: ####################
AWS Secret Access Key [None]: ########################################
Default region name [None]: us-east-2
Default output format [None]: json
Test that the credentials are working by using the AWS CLI to retrieve data about the identity which you are using to connect. This command is a good "hello world" test to ensure you have the correct credentials entered.
aws sts get-caller-identity
Sample Results
student@ubuntu:$aws sts get-caller-identity
{
    "UserId": "####################",
    "Account": "############",
    "Arn": "arn:aws:iam::############:user/student-abcde"
}
Stop if You Receive Errors!
If you receive an error when running the command above, re-run the aws configure --profile default command from above and be sure that you are using the AWS Access Key ID and AWS Secret Access Key provided by your instructor. These are NOT the same as the username and password! Do not move on with the rest of the lab until you have resolved any errors. Contact your instructor or TA for help.
Part 8: Update Lab File Repositories on Ubuntu
Environment Check
Before proceeding, ensure that you are working in Windows Terminal in a SSH session to the Ubuntu VM.
Background: Your course VMs use files that are synchronized from a GitHub repository. In this section of the lab, you will ensure that your course VMs have the latest copies of the files from the repositories.
Instructions: Update the student lab files repository.
cd /home/student/labFiles
git pull
Run the VM setup script, which will finalize the setup of local websites on the Ubuntu VM:
bash /home/student/labFiles/scripts/setup.sh
Validate the Ubuntu Lab Setup
Finally, validate that the setup steps you've done so far on the Windows have been successful, you can run a set of "unit tests" included in the lab files repository. Begin by starting PowerShell Core on the Ubuntu VM. Notice that the prompt now starts with PS.
pwsh
Sample Results
student@ubuntu:~$ pwsh
PowerShell 7.4.7
Copyright (c) Microsoft Corporation.

https://aka.ms/powershell
Type 'help' to get help.

PS /home/student/labFiles>
Then, to setup and run the tests using the Pester PowerShell module, run these commands:
$config=New-PesterConfiguration
$config.Output.Verbosity='detailed'
$config.Run.Path='~/labFiles/pester/Ubuntu.Setup.tests.ps1'
Invoke-Pester -Configuration $config
Note that the tests import several PowerShell modules and may take some time to run.
Sample Results
PS /home/student> $config=New-PesterConfiguration
PS /home/student> $config.Output.Verbosity='detailed'
PS /home/student> $config.Run.Path='~/labFiles/pester/Ubuntu.Setup.tests.ps1'
PS /home/student> Invoke-Pester -Configuration $config
Pester v5.7.1

Starting discovery in 1 files.
...
[Results Truncated]
When the tests have finished, ensure that the Failed, Skipped, and NotRun numbers are all ZERO. If this is not the case, please contact your instructor or TA for help.
Sample Results
Tests completed in 7.43s
Tests Passed: ##, Failed: 0, Skipped: 0, Inconclusive: 0, NotRun: 0
Close all open Windows Terminal windows after you have completed these steps.