Lab 1.4: Cloud Service Provider Inventory
VMs Needed
- Windows
- Ubuntu
Lab Video
Objectives
- Use the Tag Editor and the CLI to gather inventory data from AWS.
- Use Resource Graph Explorer and the CLI to gather Azure inventory.
Lab Preparation
Ensure the VMs needed for the lab are booted and that you have logged in to the Windows VM.
Part 1: AWS Inventory - Web Console
Background: It's a widely understood concept that it's impossible to secure resources if you don't know they exist! Obtaining a current inventory from a cloud service provider (CSP) can sometimes be much more difficult than you would expect. In this lab, you will explore some of the techniques that can be used to obtain a thorough resource inventory.
The AWS tag editor allows you to search for virtually any resource type in an AWS account, across as many regions as you want. While it's intended to be used for managing resource tagging, we've found it to be a reliable tool for quickly gathering an inventory of resources in an account. In this section, you will use tag editor to export a list of resources from the AWS account we've set up for your class labs.
Cloud Resource Names Will Vary!
The cloud-based labs for this class are auto-provisioned using infrastructure as code (IaC) technologies. To ensure unique names across every running course, we have added random strings to some of the resource names. This will cause small variances between the screenshots and the tool output you will see.
For example, you may see a screenshot where a username is shown as TSmith-a1b2c, while your testing reveals a user named TSmith-z3x4q. This is expected behavior, and you may see it occur for ANY resource, including VM instances, networks, users, and groups. In many cases, we have blurred these parts of the results in our screenshots to let you focus on the important information.
Instructions: In Firefox on the Windows VM, browse to the AWS console at https://aws.amazon.com/console/ and click on the Sign In to the Console button.
https://aws.amazon.com/console/

On the login page, enter the account number, username, and console password provided by your instructor and then click the Sign In button.
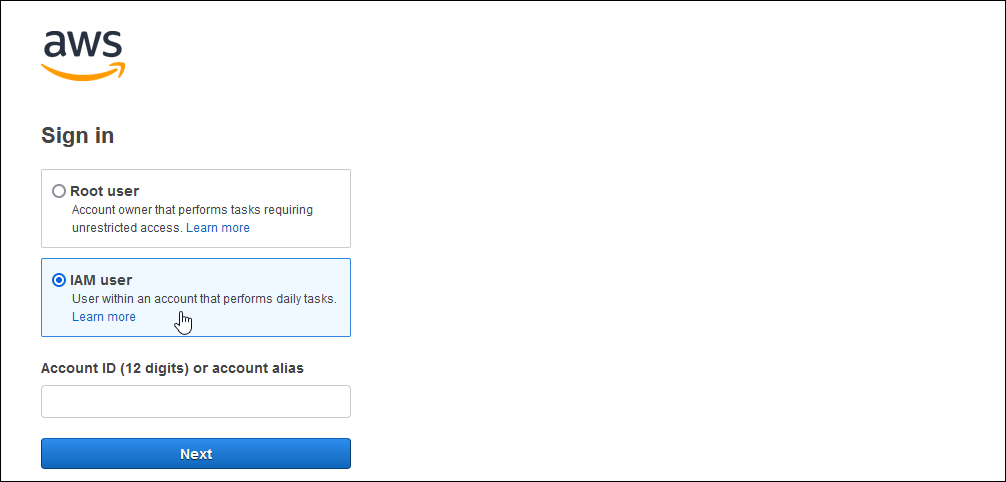
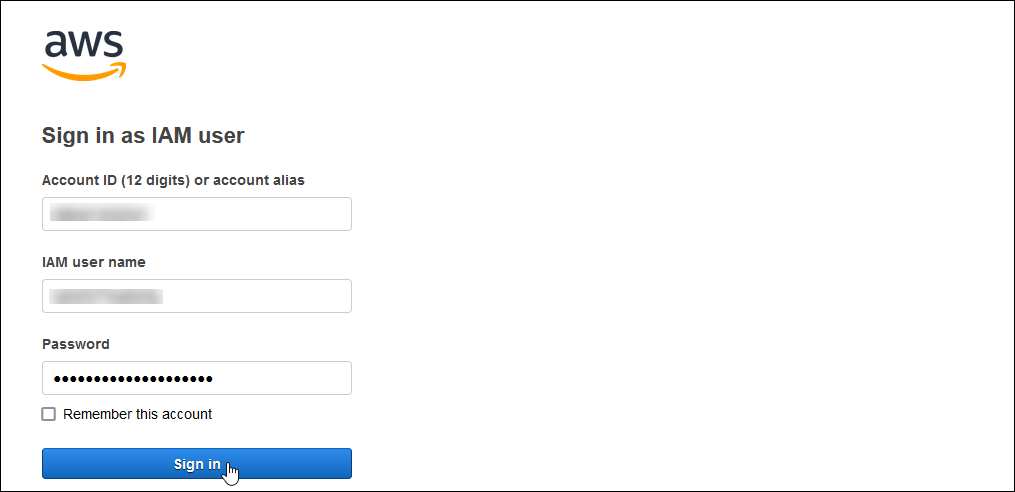
Dismiss any introductory windows.
In the AWS console, click in the search box and search for tag editor. In the results, click on the link for Resource Groups & Tag Editor.
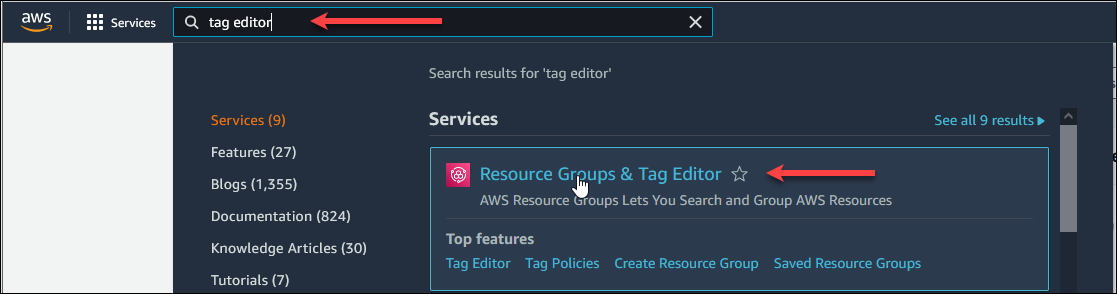
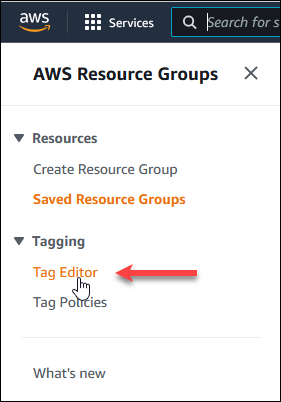
In the navigation bar at the left of the screen, click on the link for Tag Editor.
Begin your search by choosing which regions should be examined. Use the "Regions" drop-down list to choose the us-east-2 and us-west-1 regions. You can type in the box to quickly search for the regions you want. Note that us-east-2 may already be chosen for you.
Choose All supported resource types in the "Resource types" drop-down box. Then, click the Search resources button.
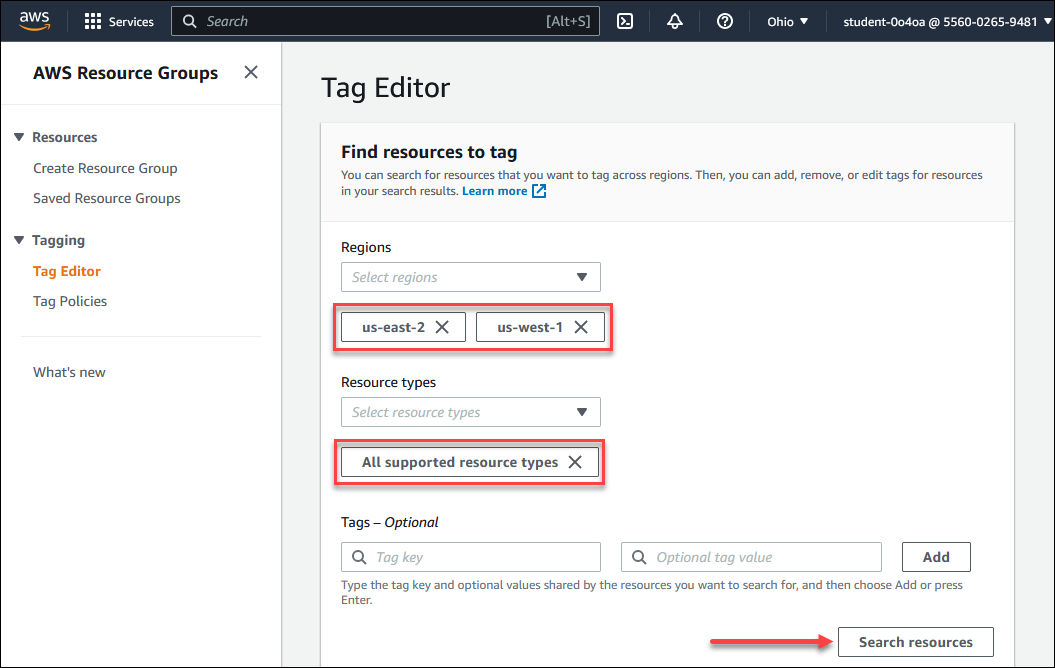
Watch the "Resource search results" pane until the "Loading resources" text is replaced with the total number of resources returned, and the Export resource to CSV button is enabled and shows the number of results returned.

Live Data in Use!
Remember that your data may differ from these results since you have retrieved live data from the cloud provider environment!
Your student user is not provisioned to view all resources in the AWS account. If you receive an error message including ForbiddenException, you can simply close the message by clicking on the X.

Export the report CSV by clicking on the Export ## resources to CSV button and choosing the Export all tags option.

When the file finishes downloading, click on the downloads icon next to the Firefox URL bar and click the CSV file you just downloaded.
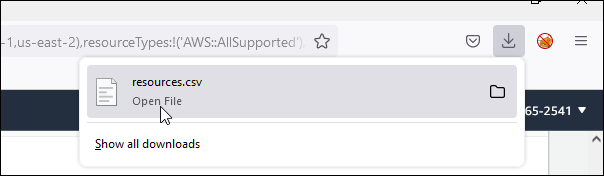
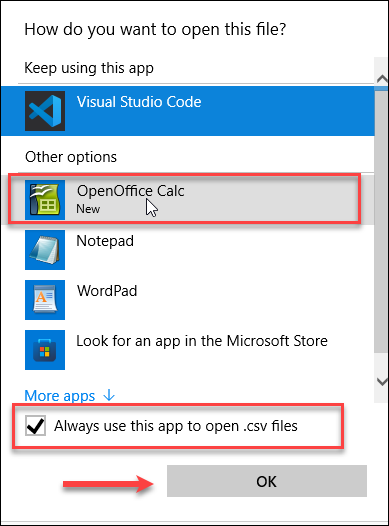
If you are prompted to choose a program to open the CSV file, choose OpenOffice Calc, check the box to always use that app to open CSV files, and then click the OK button.
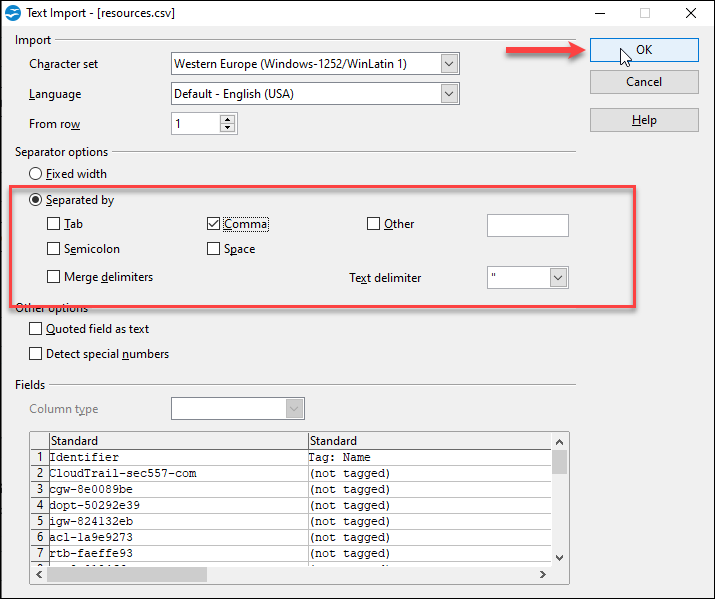
Ensure that you check the "comma" separator, uncheck all others, and then click on the OK button. This will tell OpenOffice that the file is delimited by commas and allow a proper import.
Once the file loads, choose the Data|Filter|AutoFilter menu option to enable filtering by the data in any column.
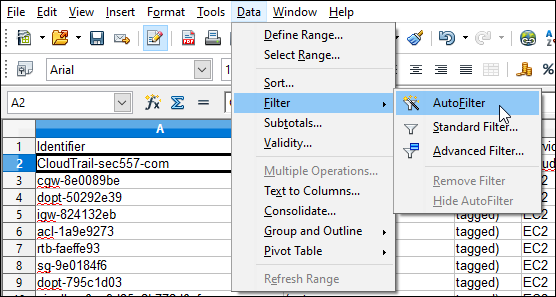
Spend some time exploring the resources returned and then close the spreadsheet when you are finished.
Part 2: AWS Inventory - CLI/PowerShell
Preparation: Launch a PowerShell Core terminal by clicking the Windows Terminal icon in the taskbar.

Environment Check
Before proceeding, ensure that you are working in Windows Terminal in PowerShell Core.

Background: Getting a full inventory from the CLI/PowerShell can be a painstaking and tedious process, but sometimes it's the best way to get exactly the data you need. In this section of the lab, you will learn CLI and PowerShell commands that will be useful in gathering inventory and configuration data. We will explore a few resource-specific queries to familiarize you with the tools. You'll need to do separate queries for each resource type.
Instructions:
Begin by obtaining a list of EC2 instances in the AWS account. If you did not turn off the cli pager in an earlier lab, then use spacebar to advance the results one page at a time, or the q key to quit viewing the results.
aws ec2 describe-instances
Sample Results
PS > aws ec2 describe-instances
{
    "Reservations": [
        {
            "Groups": [],
            "Instances": [
                {
                    "AmiLaunchIndex": 0,
                    "ImageId": "ami-09c08b542a3df6eac",
                    "InstanceId": "i-094c10ef3ad15d6d3",
                    "InstanceType": "m5.large",
                    "KeyName": "event-1032-aud1-range-aws-eksgd",
                    "LaunchTime": "2023-02-05T22:39:34+00:00",
                    "Monitoring": {
                        "State": "disabled"
                    },
...
[Results Truncated]
Live Data in Use!
Remember that your data may differ from these results!
As you've seen with other CLI commands, the CLI returns data in the format you have specified in your config file, in this case, JSON. Imagine that you have been tasked with obtaining a JSON array consisting of the InstanceId, InstanceType, and Tags for every EC2 instance in the account. One technique would be to use jq to get the properties you want.
From analyzing the returned JSON, you will see that the results are all in an array called Reservations, which contains an array called Instances. Try using jq to retrieve all the properties for the first Instance element in the Reservations array.
aws ec2 describe-instances | jq '.Reservations[].Instances[0]'
Sample Results
PS > aws ec2 describe-instances | jq '.Reservations[].Instances[0]'
{
  "AmiLaunchIndex": 0,
  "ImageId": "ami-09c08b542a3df6eac",
  "InstanceId": "i-094c10ef3ad15d6d3",
  "InstanceType": "m5.large",
  "KeyName": "event-1032-aud1-range-aws-eksgd",
  "LaunchTime": "2023-02-05T22:39:34+00:00",
  "Monitoring": {
    "State": "disabled"
  },
...
[Results Truncated]
Live Data in Use!
Remember that your data may differ from these results!
Using the techniques you learned in the earlier jq lab, extract a JSON object with only the properties you need. Note the square brackets ([ and ]) wrapping the entire jq command, which causes jq to make the output an array. Also, note the curly braces ({ and }), which cause jq to format the requested properties as an object:
aws ec2 describe-instances |
  jq '[.Reservations[].Instances[0] |
  { "InstanceId": .InstanceId, "Instancetype": .InstanceType, "Tags":.Tags  }]'
Sample Results
PS > aws ec2 describe-instances |
>>   jq '[.Reservations[].Instances[0] |
>>   { "InstanceId": .InstanceId, "Instancetype": .InstanceType, "Tags":.Tags  }]'
[
  {
    "InstanceId": "i-094c10ef3ad15d6d3",
    "Instancetype": "m5.large",
    "Tags": [
      {
        "Key": "Attributes",
        "Value": "dc01"
      },
...
[Results Truncated]
Live Data in Use!
Remember that your data may differ from these results!
Test that you have generated valid JSON by converting the JSON array into PowerShell objects using the ConvertFrom-Json cmdlet.
aws ec2 describe-instances |
  jq '[.Reservations[].Instances[0] |
  { "InstanceId": .InstanceId, "Instancetype": .InstanceType, "Tags":.Tags  }]' |
    ConvertFrom-Json
Sample Results
PS > aws ec2 describe-instances |
>>   jq '[.Reservations[].Instances[0] |
>>   { "InstanceId": .InstanceId, "Instancetype": .InstanceType, "Tags":.Tags  }]' |
>>     ConvertFrom-Json

InstanceId          Instancetype Tags
----------          ------------ ----
i-094c10ef3ad15d6d3 m5.large     {@{Key=Attributes; Value=dc01}, @{Key=sans:event-product-id; Value=aud1-i01-gen}, @…
i-0bc17737bf7fc8d2f t2.micro     {@{Key=ProjectName; Value=Customer Web Portal}, @{Key=ProjectID; Value=IT2021-1234}, …
i-074ac9bda221abfe9 t2.micro     {@{Key=sans:event-product-id; Value=aud1-i01-gen}, @{Key=sans:created-by; Value=arn…
i-0c1fa1f4bbf653025 t2.micro     {@{Key=sans:course-id; Value=aud507}, @{Key=sans:event-id; Value=1032}, @{Key=Name; V…
i-064c394e2892fb0de t2.large     {@{Key=Namespace; Value=event-1032}, @{Key=Name; Value=event-1032-aud1-range-aws-ek…
Live Data in Use!
Remember that your data may differ from these results!
Another option for retrieving and processing inventory data is to use PowerShell, taking advantage of its data handling capabilities. Begin by ensuring that the AWS PowerShell module is loaded.
Import-Module AWSPowerShell.NetCore
The AWSPowerShell module has a LOT of Get-* cmdlets that can be useful for inventory collection. View the number of Get-* cmdlets
by using Get-Command to return the list of cmdlets and Measure-Object to count how many there are:
Get-Command -Module AWSPowerShell.NetCore -name Get-* | Measure-Object
Sample Results
PS > Import-Module AWSPowerShell.NetCore
PS > Get-Command -Module AWSPowerShell.NetCore -name Get-* | Measure-Object

Count             : 7260
Average           :
Sum               :
Maximum           :
Minimum           :
StandardDeviation :
Property          :
...
[Results Truncated]
Live Data in Use!
Remember that your data may differ from these results!
Let's explore some of the cmdlets for getting resource information. Obtain a list of AWS Virtual Private Clouds (VPCs) using this command. Remember that VPCs are a container for subnets and resources within an account. VPCs can be used for logical segregation in the account.
Get-EC2Vpc
Sample Results
PS > Get-EC2Vpc

CidrBlock                   : 10.130.8.0/21
CidrBlockAssociationSet     : {vpc-cidr-assoc-084003957adb6b1c0}
DhcpOptionsId               : dopt-064ffcd2462d9032f
InstanceTenancy             : default
Ipv6CidrBlockAssociationSet : {vpc-cidr-assoc-0f6ab2926774f2880}
IsDefault                   : False
OwnerId                     : 635360817199
State                       : available
Tags                        : {Namespace, sans:course-id, sans:creation-method, Stage…}
VpcId                       : vpc-00c6d19695241d875
...
[Results Truncated]
Live Data in Use!
Remember that your data may differ from these results!
Inventory measurements will often include taking a simple count of resources by type. The Count property in PowerShell will (not surprisingly) return the count of objects in an array. To count the VPCs in the account, use this command:
(Get-EC2Vpc).Count
Sample Results
PS > (Get-EC2Vpc).Count
3
Live Data in Use!
Remember that your data may differ from these results!
Recall that earlier, you collected information on the EC2 virtual machine instances running in the account, using a CLI command. The equivalent PowerShell command would be:
Get-EC2Instance
Sample Results
PS > Get-EC2Instance

GroupNames    : {}
Groups        : {}
Instances     : {event-1032-aud1-range-aws-eksgd}
OwnerId       : 635360817199
RequesterId   :
ReservationId : r-06324f905aa2d0fd4

GroupNames    : {}
Groups        : {}
Instances     : {}
OwnerId       : 635360817199
RequesterId   :
ReservationId : r-0ad1da9177cb5ece5
...
[Results Truncated]
Live Data in Use!
Remember that your data may differ from these results!
The results seem to be the contents of the Reservations array returned by the CLI command. The instances property under the Reservations object is what you looked at earlier using jq:
(Get-EC2Instance).Instances
Sample Results
PS > (Get-EC2Instance).Instances

InstanceId          InstanceType Platform PrivateIpAddress PublicIpAddress SecurityGroups
----------          ------------ -------- ---------------- --------------- --------------
i-094c10ef3ad15d6d3 m5.large     Windows  10.55.7.100                      {terraform-20230205223931419500000007}
i-0bc17737bf7fc8d2f t2.micro              10.55.7.69       3.142.111.88    {default}
i-074ac9bda221abfe9 t2.micro              10.55.7.68       18.223.72.229   {default}
i-0c1fa1f4bbf653025 t2.micro              10.55.7.15       18.190.54.147   {default}
i-064c394e2892fb0de t2.large              10.55.0.89       52.15.49.110    {event-1032-aud1-range-aws-eksgd-bastion}
Live Data in Use!
Remember that your data may differ from these results!
Remember that the Select-Object cmdlet can be used to select only the properties you want from the results.
(Get-EC2Instance).Instances | Select-Object InstanceId, InstanceType, PrivateIpAddress, PublicIPAddress, SecurityGroups, SubnetId, VpcId, Tags
Sample Results
PS > (Get-EC2Instance).Instances | Select-Object InstanceId, InstanceType, PrivateIpAddress, PublicIPAddress, SecurityGroups, SubnetId, VpcId, Tags

InstanceId       : i-094c10ef3ad15d6d3
InstanceType     : m5.large
PrivateIpAddress : 10.55.7.100
PublicIpAddress  :
SecurityGroups   : {terraform-20230205223931419500000007}
SubnetId         : subnet-0e203882f70f93557
VpcId            : vpc-07b32ea295f9a1c21
Tags             : {Attributes, sans:event-product-id, sans:created-by, Namespace…}
...
[Results Truncated]
Live Data in Use!
Remember that your data may differ from these results!
The Where-Object cmdlet is used to filter the results to show only those that match some criteria (like a WHERE clause in SQL). In this command, you show only those EC2 instances that are missing their 'Business_Unit' tag (have a count of less than 1).
(Get-EC2Instance |
  Where-Object {
    ($_.Instances.tags | Where-Object Key -eq 'Business_Unit').Count -lt 1
  }
).instances
Sample Results
PS > (Get-EC2Instance |
>>   Where-Object {
>>     ($_.Instances.tags | Where-Object Key -eq 'Business_Unit').Count -lt 1
>>   }
>> ).instances

InstanceId          InstanceType Platform PrivateIpAddress PublicIpAddress SecurityGroups
----------          ------------ -------- ---------------- --------------- --------------
i-094c10ef3ad15d6d3 m5.large     Windows  10.55.7.100                      {terraform-20230205223931419500000007}
i-0c1fa1f4bbf653025 t2.micro              10.55.7.15       18.190.54.147   {default}
i-064c394e2892fb0de t2.large              10.55.0.89       52.15.49.110    {event-1032-aud1-range-aws-eksgd-bastion}
Live Data in Use!
Remember that your data may differ from these results!
Since you are able to count resources with specific property values, you can use those counts to perform calculations. In this example, you divide the number of instances with no tags by the total number of instances to calculate the percentage of noncompliant instances.
$totalCount = (Get-EC2Instance).Count
$nonCompliantCount = (Get-EC2Instance |
  Where-Object {
    ($_.Instances.tags | Where-Object Key -eq 'Business_Unit').Count -lt 1
}).Count
$totalCount
$nonCompliantCount
$nonCompliantPct = ($nonCompliantCount/$totalCount) * 100.0
$nonCompliantPct
Sample Results
PS > $totalCount = (Get-EC2Instance).Count
PS > $nonCompliantCount = (Get-EC2Instance |
>>   Where-Object {
>>     ($_.Instances.tags | Where-Object Key -eq 'Business_Unit').Count -lt 1
>> }).Count
PS > $totalCount
5
PS > $nonCompliantCount
3
PS > $nonCompliantPct = ($nonCompliantCount/$totalCount) * 100.0
PS > $nonCompliantPct
60
Live Data in Use!
Remember that your data may differ from these results!
Please stop here. You do not have Azure lab credentials, but we included the instructions for doing these steps in your own Azure environment. Your instructor may choose to work through these parts with you as a demonstration.
Instructor Demo: Azure Inventory - Web Console
Background: Azure offers a web console tool called Resource Graph Explorer, which is designed for doing resource queries using a Graph database. In this lab section, you will use the Resource Graph Explorer to perform simple inventory queries against the lab target Azure subscription.
Instructions: In Firefox on the Windows VM, log on to the Azure portal at https://portal.azure.com/ using the credentials from your instructor. If your browser has cached credentials from your earlier sign-ins, you should just be able to click on the account username you used previously.
https://portal.azure.com/
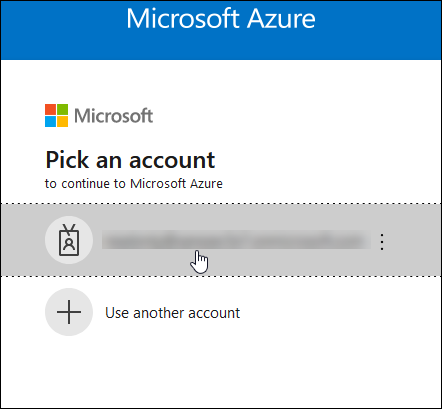
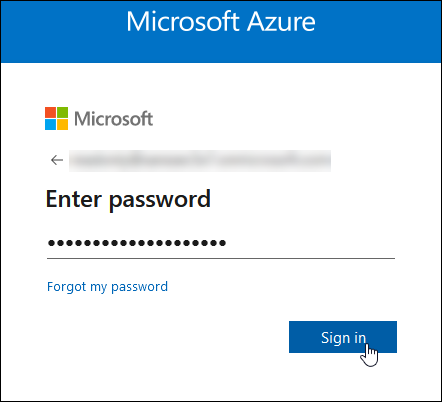
If prompted, enter your password.
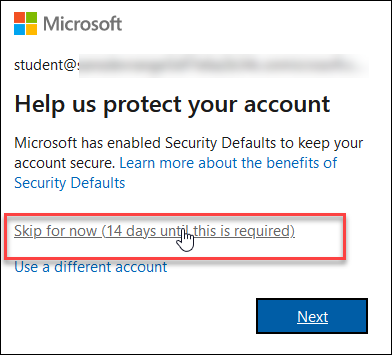
If you are prompted to set up Security Defaults on your account (which would require registering for multifactor authentication), click the link to Skip for now. If prompted, click the button to stay signed in.
Dismiss any introductory windows.
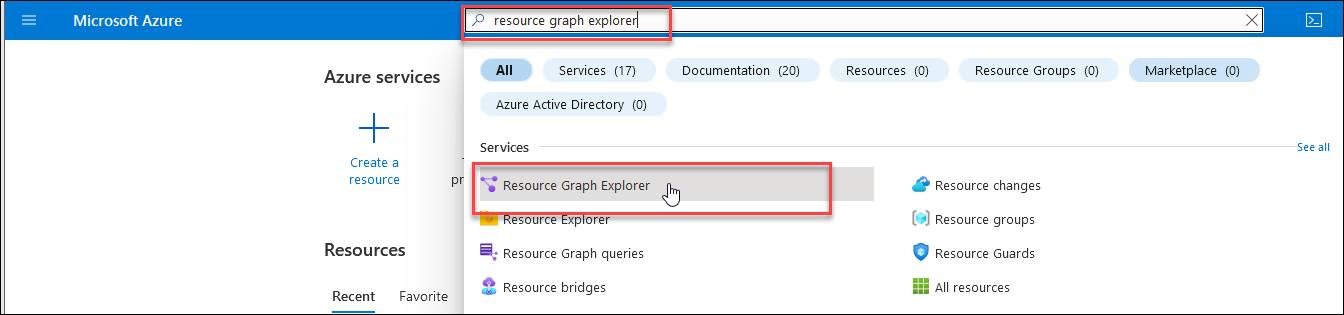
In the Azure portal web console, search for resource graph explorer, and click on the link to the tool in the search results.
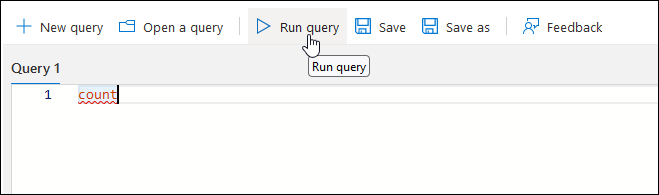
Begin by performing a simple query to count the resources in the subscription. Enter count in the query editor pane and then click on the Run query button.
count
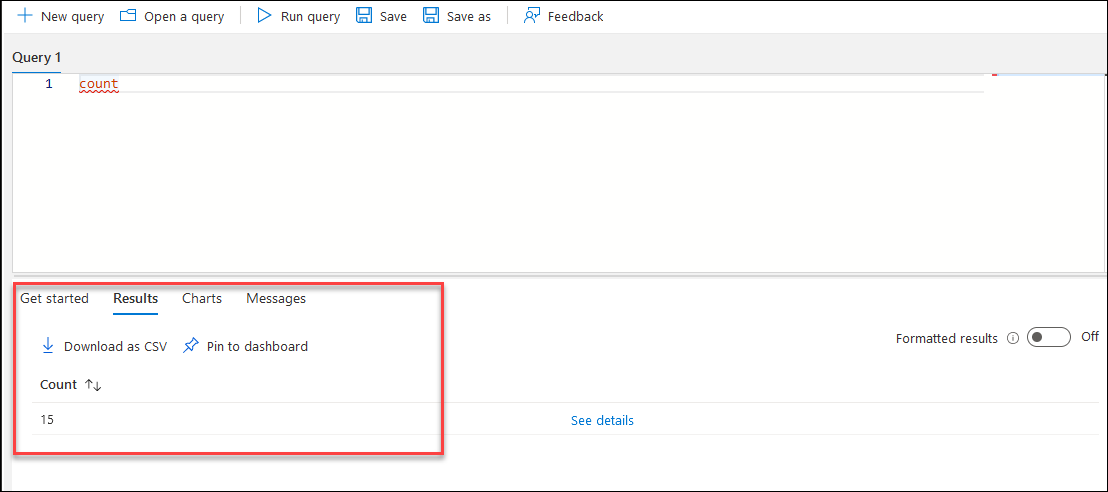
Live Data in Use!
Remember that your data may differ from these results since you have retrieved live data from the cloud provider environment!
Note the Download as CSV and Pin to dashboard links in the console. While we will not use them in this lab, both are useful for memorializing the query results. While your account will not have permissions to create shared dashboards, feel free to download and explore the CSV file.
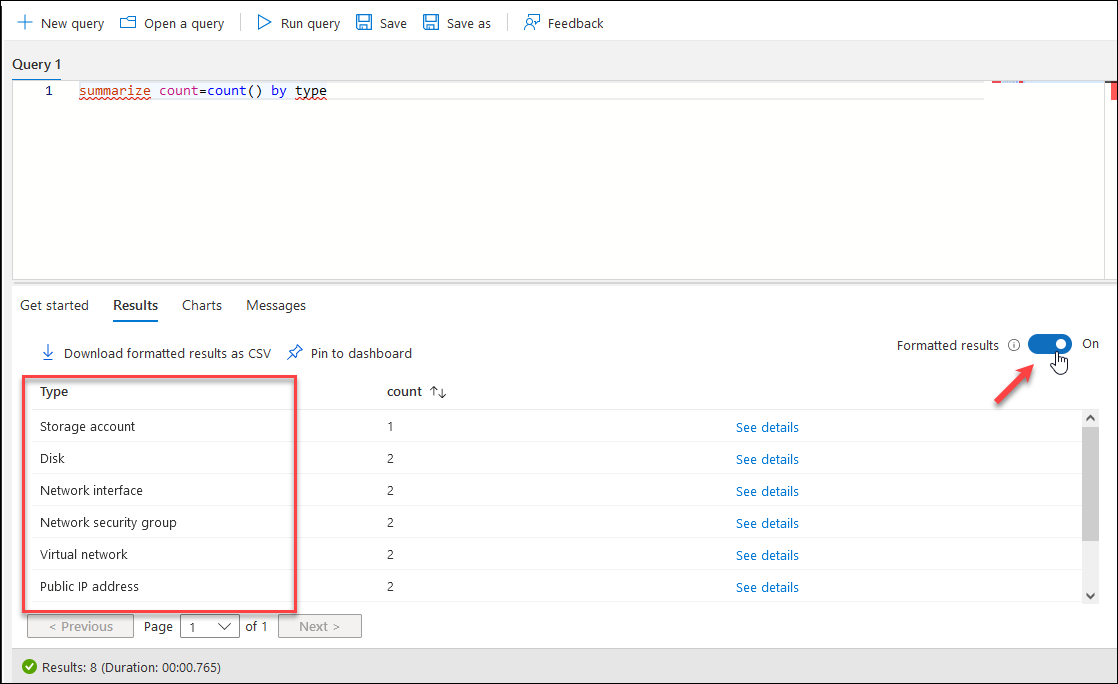
Another useful query would be to gather resources with counts grouped by resource type. Change the query to the one listed below and click the 'Run query' button to run it.
summarize count=count() by type
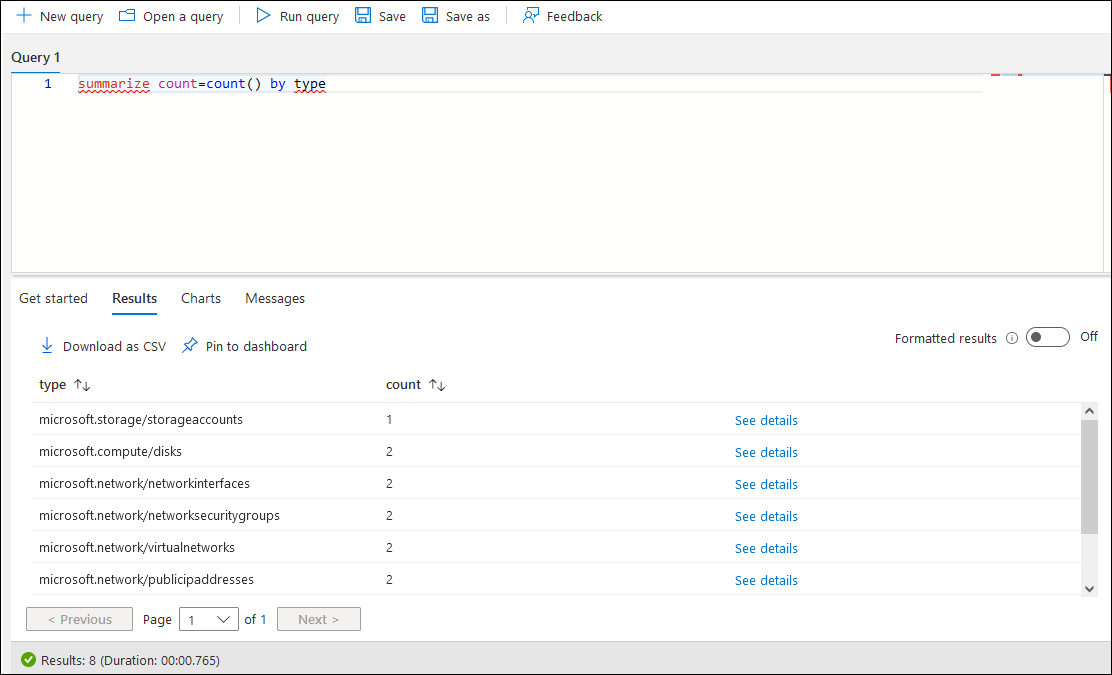
The type column in the results pane gives a rather long resource type descriptions. You can get more readable descriptions by turning on the 'Formatted results' toggle. This shortens the resource types to something a bit more readable. Try changing the Formatted results toggle to On to see the difference in the display. NOTE: The screenshots for the rest of the lab were taken with the toggle off.
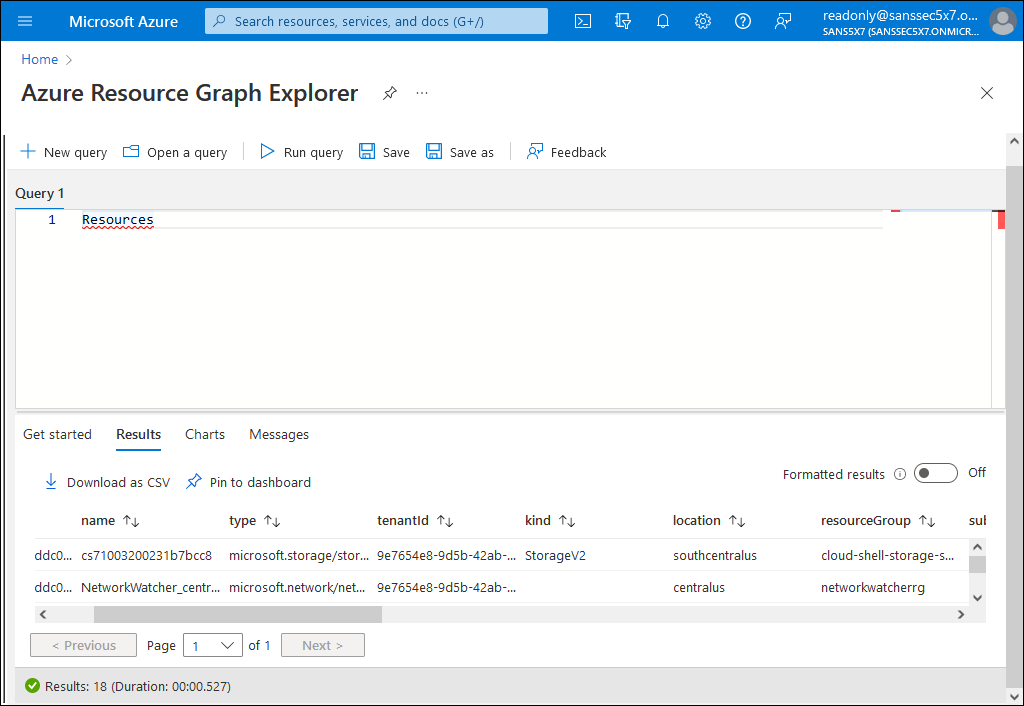
To get a full inventory of all resources in the subscription, simply run this query:
Resources
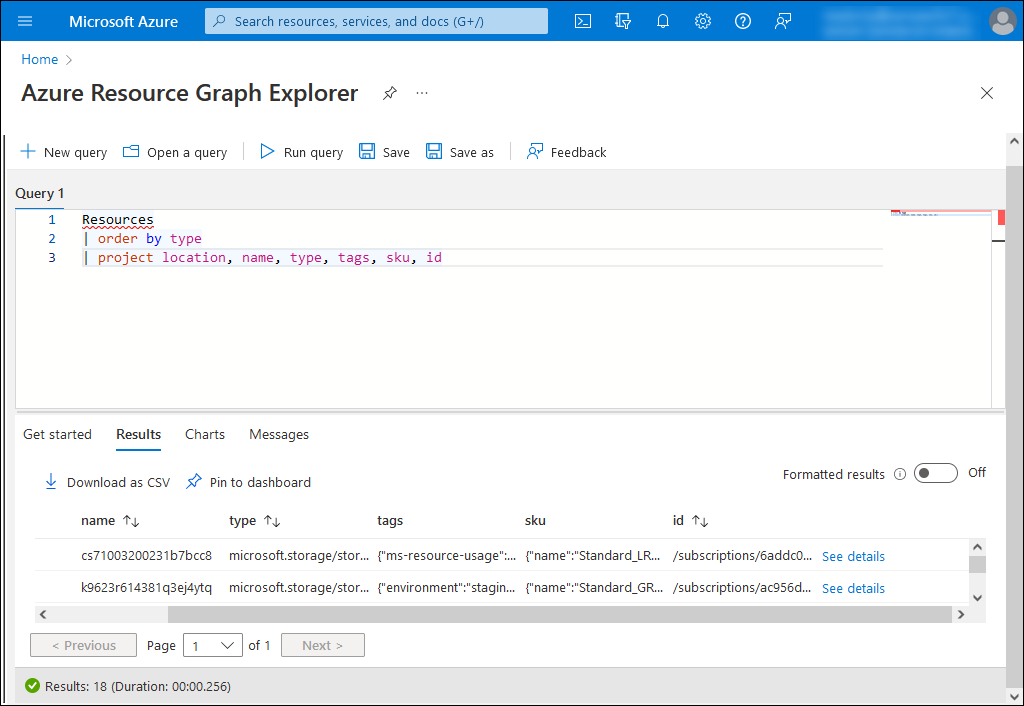
Get a sorted inventory (order by type) using the project keyword (project location, name, type, tags, sku, id) to select important fields. This result would be suitable for export to CSV:
Resources
| order by type
| project location, name, type, tags, sku, id
There are example queries on the Resource Graph Explorer page; feel free to click on a few and see how they work.
Instructor Demo: Azure Inventory - CLI/PowerShell
Environment Check
Before proceeding, ensure that you are working in Windows Terminal in PowerShell Core.
Background: Resource graph queries are also available in the Azure CLI and PowerShell. In this section of the lab, you will use the the resource-graph extension to the Azure CLI and the equivalent PowerShell commands to gather inventory data.
Instructions: First, verify that the resource-graph extension for the CLI is installed:
az extension add --name resource-graph
Use this command to verify that the extension is correctly installed:
az extension list
Sample Results
PS > az extension list
[
  {
    "experimental": false,
    "extensionType": "whl",
    "name": "resource-graph",
    "path": "C:\\Users\\student\\.azure\\cliextensions\\resource-graph",
    "preview": false,
    "version": "2.1.0"
  }
]
You can use the same queries you would in the web console at the CLI. Run the count query that you used before to get a count of resources. The number of resources returned should match what you saw in Resource Graph Explorer in the Azure web console earlier in the lab.
az graph query -q 'count'
Sample Results
PS > az graph query -q 'count'
{
  "count": 1,
  "data": [
    {
      "Count": 26
    }
  ],
  "skip_token": null,
  "total_records": 1
}
Live Data in Use!
Remember that your data may differ from these results!
Use the query you used earlier to get a full list of resources from the account:
az graph query -q 'Resources'
Sample Results
PS > az graph query -q 'Resources'
{
  "count": 26,
  "data": [
    {
      "extendedLocation": null,
      "id": "/subscriptions/f1552005-c77b-4e4e-a66b-74bb6bbd7406/resourceGroups/event-1032-aud1-range-azure-x0x
             ut-dev-testing/providers/Microsoft.Network/virtualNetworks/event-1032-aud1-range-azure-x0xut-dev-testing",
      "identity": null,
      "kind": "",
      "location": "eastus",
      "managedBy": "",
      "name": "event-1032-aud1-range-azure-x0xut-dev-testing",
...
[Results Truncated]
Live Data in Use!
Remember that your data may differ from these results!
Since the results are returned as JSON, you can process them using jq or ConvertFrom-Json. Note from the above queries that the resource data is in the data[] JSON array. Use this command to retrieve the data, convert it to a PowerShell object, and then output the data[] array.
(az graph query -q 'Resources' | ConvertFrom-Json).data
Sample Results
PS > (az graph query -q 'Resources' | ConvertFrom-Json).data

extendedLocation :
id               : /subscriptions/f1552005-c77b-4e4e-a66b-74bb6bbd7406/resourceGroups/event-1032-aud1-range-azure-x0x
                   ut-dev-testing/providers/Microsoft.Network/virtualNetworks/event-1032-aud1-range-azure-x0xut-dev-testing
identity         :
kind             :
location         : eastus
managedBy        :
name             : event-1032-aud1-range-azure-x0xut-dev-testing
...
[Results Truncated]
Live Data in Use!
Remember that your data may differ from these results!
Remember from previous labs that you can use Select-Object to select properties you would like to view. This command retrieves a few useful properties from every resource returned by the query:
(az graph query -q 'Resources' | ConvertFrom-Json).data |
  Select-Object name,type,location,tags | format-list *
Sample Results
PS > (az graph query -q 'Resources' | ConvertFrom-Json).data |
>>   Select-Object name,type,location,tags | format-list *

name     : event-1032-aud1-range-azure-x0xut-dev-testing
type     : microsoft.network/virtualnetworks
location : eastus
tags     : @{Attributes=dev-testing; Environment=aud1-range-azure;
           Name=event-1032-aud1-range-azure-x0xut-dev-testing; Namespace=event-1032; Stage=x0xut;
           business_unit=Testing - temporary; env=Dev; sans:course-id=aud507;
           sans:created-by=5a5b1646-771f-4464-b8a7-323d09ddf330; sans:creation-method=terraform; sans:event-id=1032;
           sans:event-product-id=aud1-i01-gen}
...
[Results Truncated]
Live Data in Use!
Remember that your data may differ from these results!
You can check for resources with missing tags using Where-Object to find resources with a business_unit tag count that is less than 1:
(az graph query -q 'Resources' | ConvertFrom-Json).data |
  Select-Object name,type,location,tags |
  Where-Object {$_.tags.business_unit.count -lt 1}
Sample Results
PS > (az graph query -q 'Resources' | ConvertFrom-Json).data |
>>   Select-Object name,type,location,tags |
>>   Where-Object {$_.tags.business_unit.count -lt 1}

name                                                                            type                            location tags
----                                                                            ----                            -------- ----
event-1032-aud1-range-azure-x0xut-bastiOS__1_a3819530e32a4e4c8b88a64f6c633950 microsoft.compute/disks           eastus   @{Attribu…
event-1032-aud1-range-azure-x0xut-catapOS__1_2bfd325c4dc643d8b769f24c3121aa0e microsoft.compute/disks           eastus   @{Attribu…
event-1032-aud1-range-azure-x0xut-windoOS__1_119e0e5b694b4a1690c89d3e2c5920b8 microsoft.compute/disks           eastus   @{Attribu…
event-1032-aud1-range-azure-x0xut                                             microsoft.compute/sshpublickeys   eastus   @{Environ…
...
[Results Truncated]
Live Data in Use!
Remember that your data may differ from these results!
In the author's audit practice, we prefer to use PowerShell for some queries since the conversion from JSON is automatic. Ensure that the Az.ResourceGraph module is loaded before proceeding:
Import-Module Az.ResourceGraph
Run the same query you used above to get all resources, capturing the query results into a variable for processing:
$res = Search-AzGraph -Query 'Resources'
The $res variable will contain an array of PowerShell objects representing the resources in the subscription. Use the same techniques as before to get information on the resources missing the business_unit tag. Note that fl in the command is a shorthand alias for Format-List.
$res | Select-Object name,type,location,tags |
  Where-Object {$_.tags.business_unit.count -lt 1} | fl *
Sample Results
PS > $res = Search-AzGraph -Query 'Resources'
PS > $res | Select-Object name,type,location,tags |
>>   Where-Object {$_.tags.business_unit.count -lt 1} | fl *

name     : event-1032-aud1-range-azure-x0xut-bastiOS__1_a3819530e32a4e4c8b88a64f6c633950
type     : microsoft.compute/disks
location : eastus
tags     : @{Environment=aud1-range-azure; Name=event-1032-aud1-range-azure-x0xut-bastion; Stage=x0xut;
           sans:event-product-id=aud1-i01-gen; sans:creation-method=terraform;
           sans:created-by=5a5b1646-771f-4464-b8a7-323d09ddf330; sans:course-id=aud1; sans:event-id=1032;
           Namespace=event-1032; Attributes=bastion}
...
[Results Truncated]
Live Data in Use!
Remember that your data may differ from these results!
Finally, of course you can get your full resource inventory just like you did earlier.
$q = 'Resources | order by type | project location, name, type, tags, sku, id'
$inventory = Search-AzGraph -Query $q
$inventory.Count
Sample Results
PS > $q = 'Resources | order by type | project location, name, type, tags, sku, id'
PS > $inventory = Search-AzGraph -Query $q
PS > $inventory.Count
26
Live Data in Use!
Remember that your data may differ from these results!